
Explication complète de "Detailed Forecast" jusqu'à avoir les quantités à acheter pour mon produit.
1. Choose my product to plan
By clicking on the "Potential" page, you will be presented with a list of all products created in your PLM (or ERP depending on the brand).
By default the list is loaded with the last season created (here for example "2023E")

You can search for your product directly by entering the reference name or the reference code in the search field.
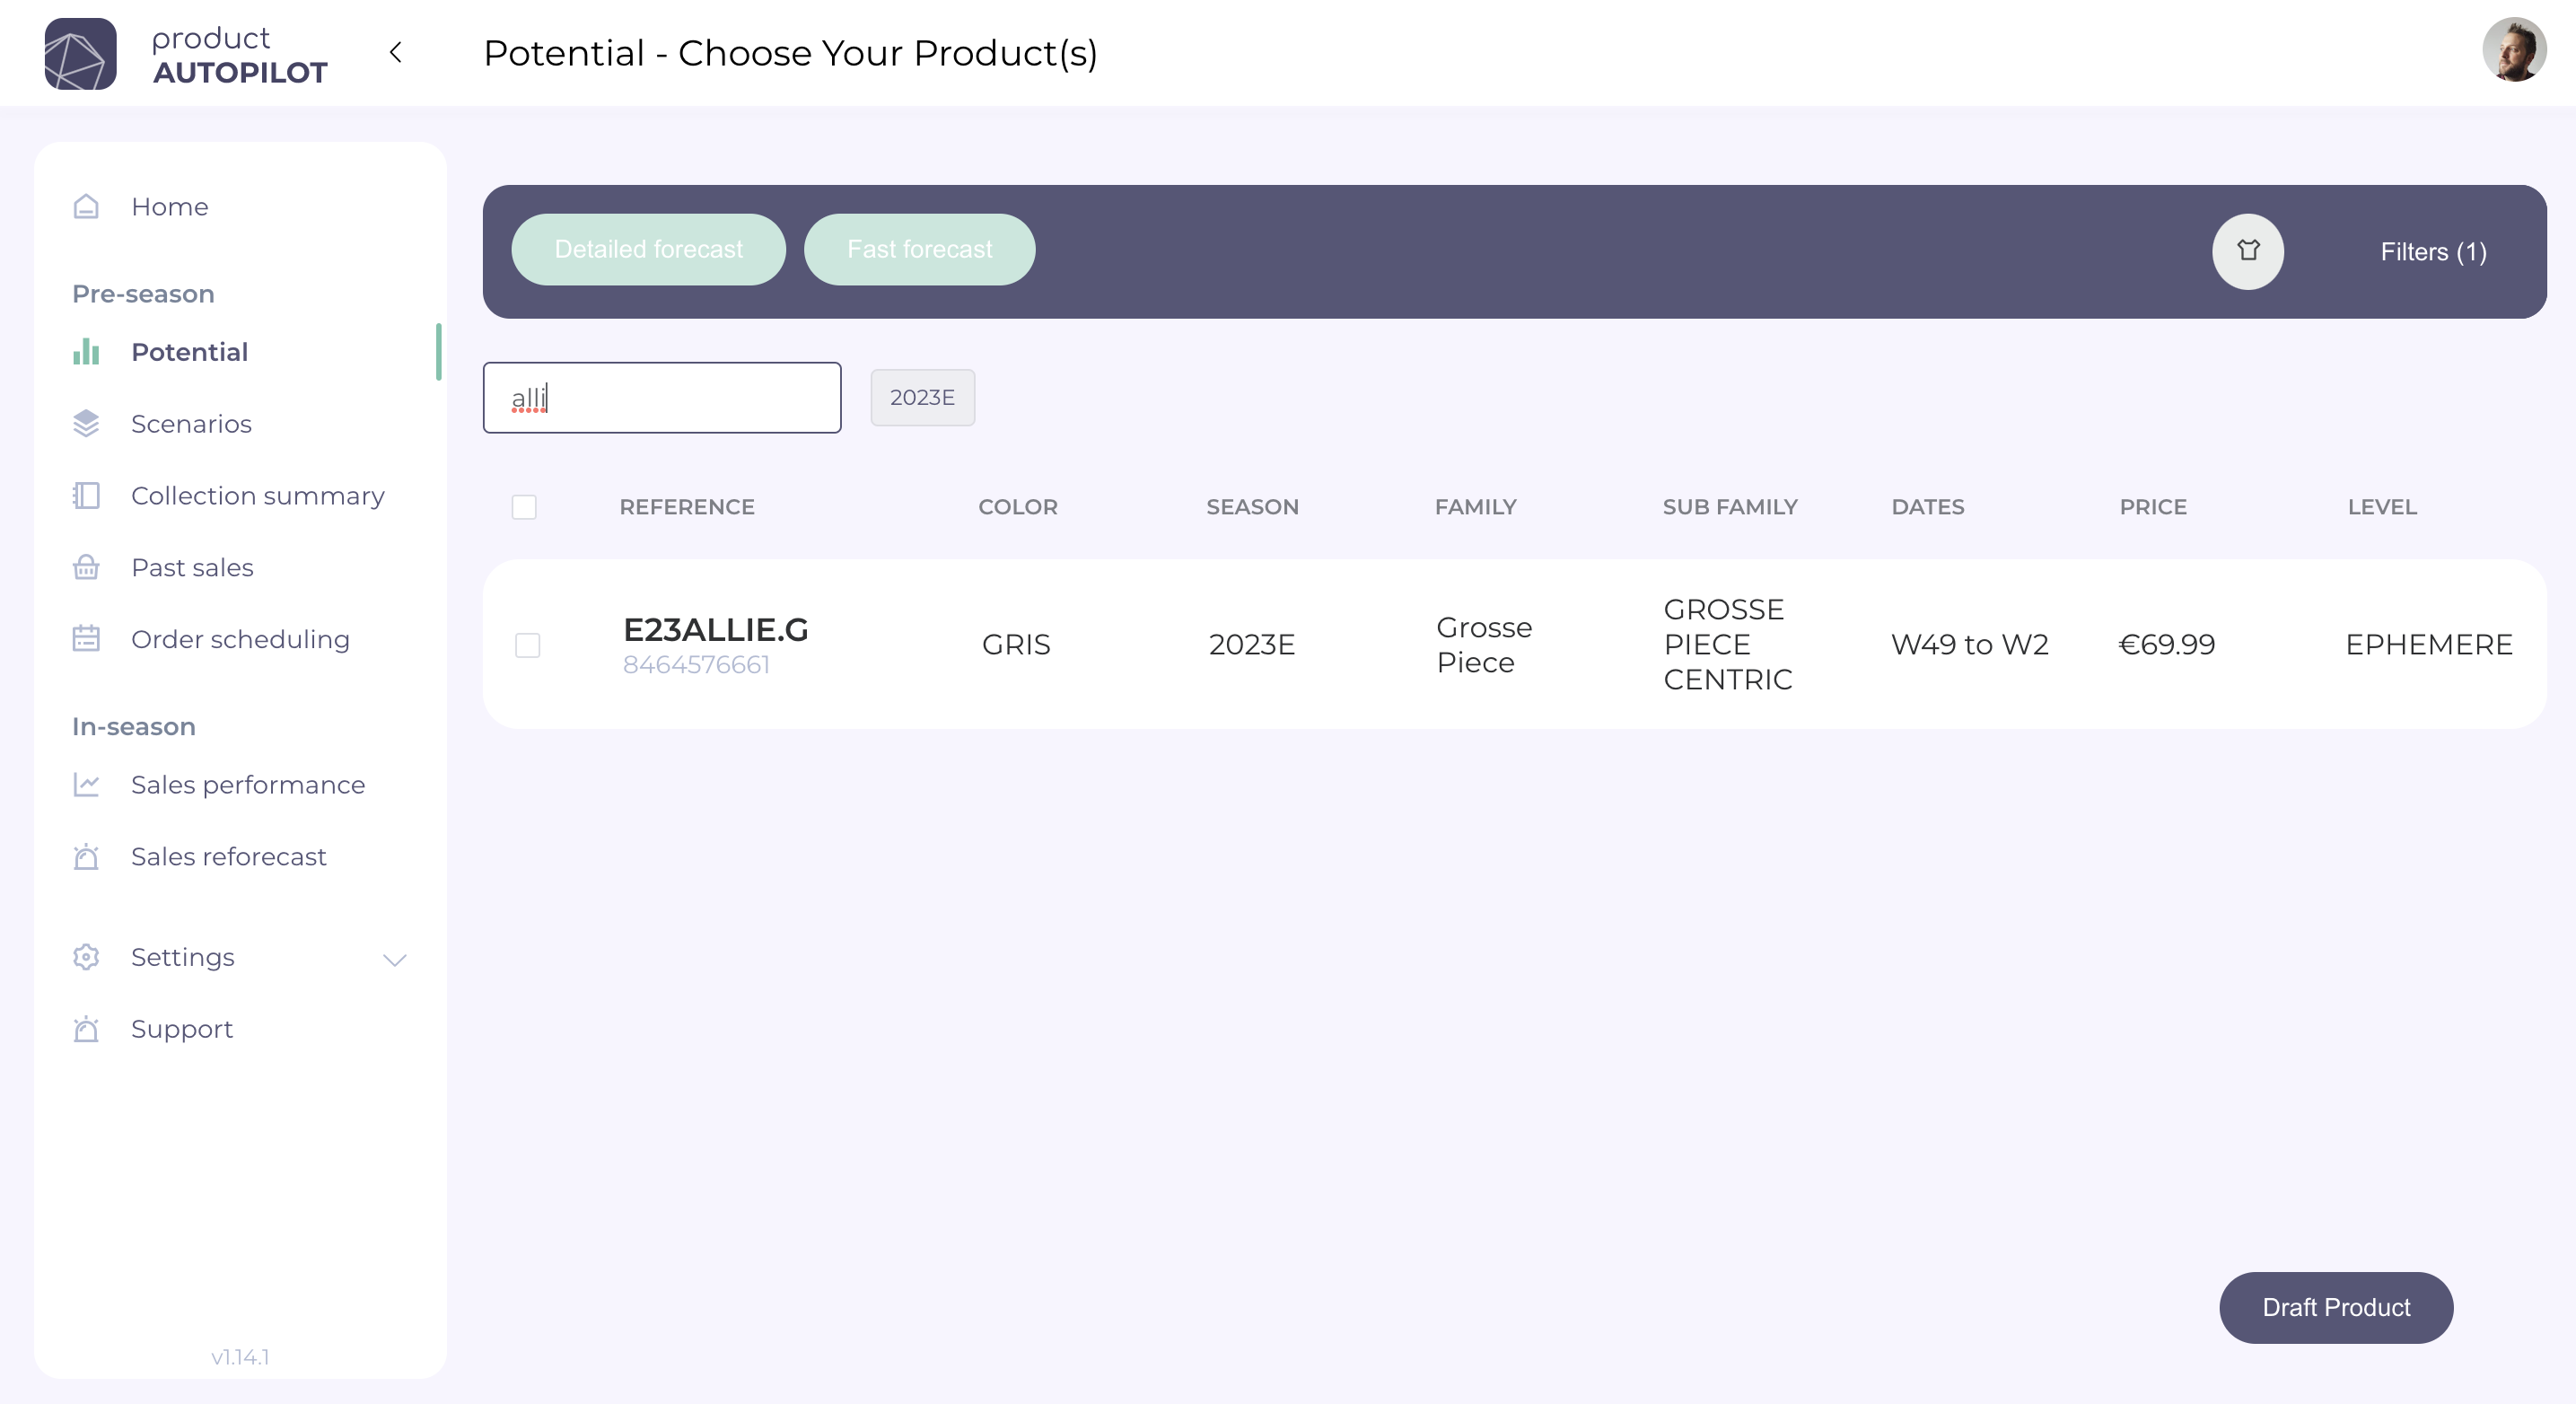
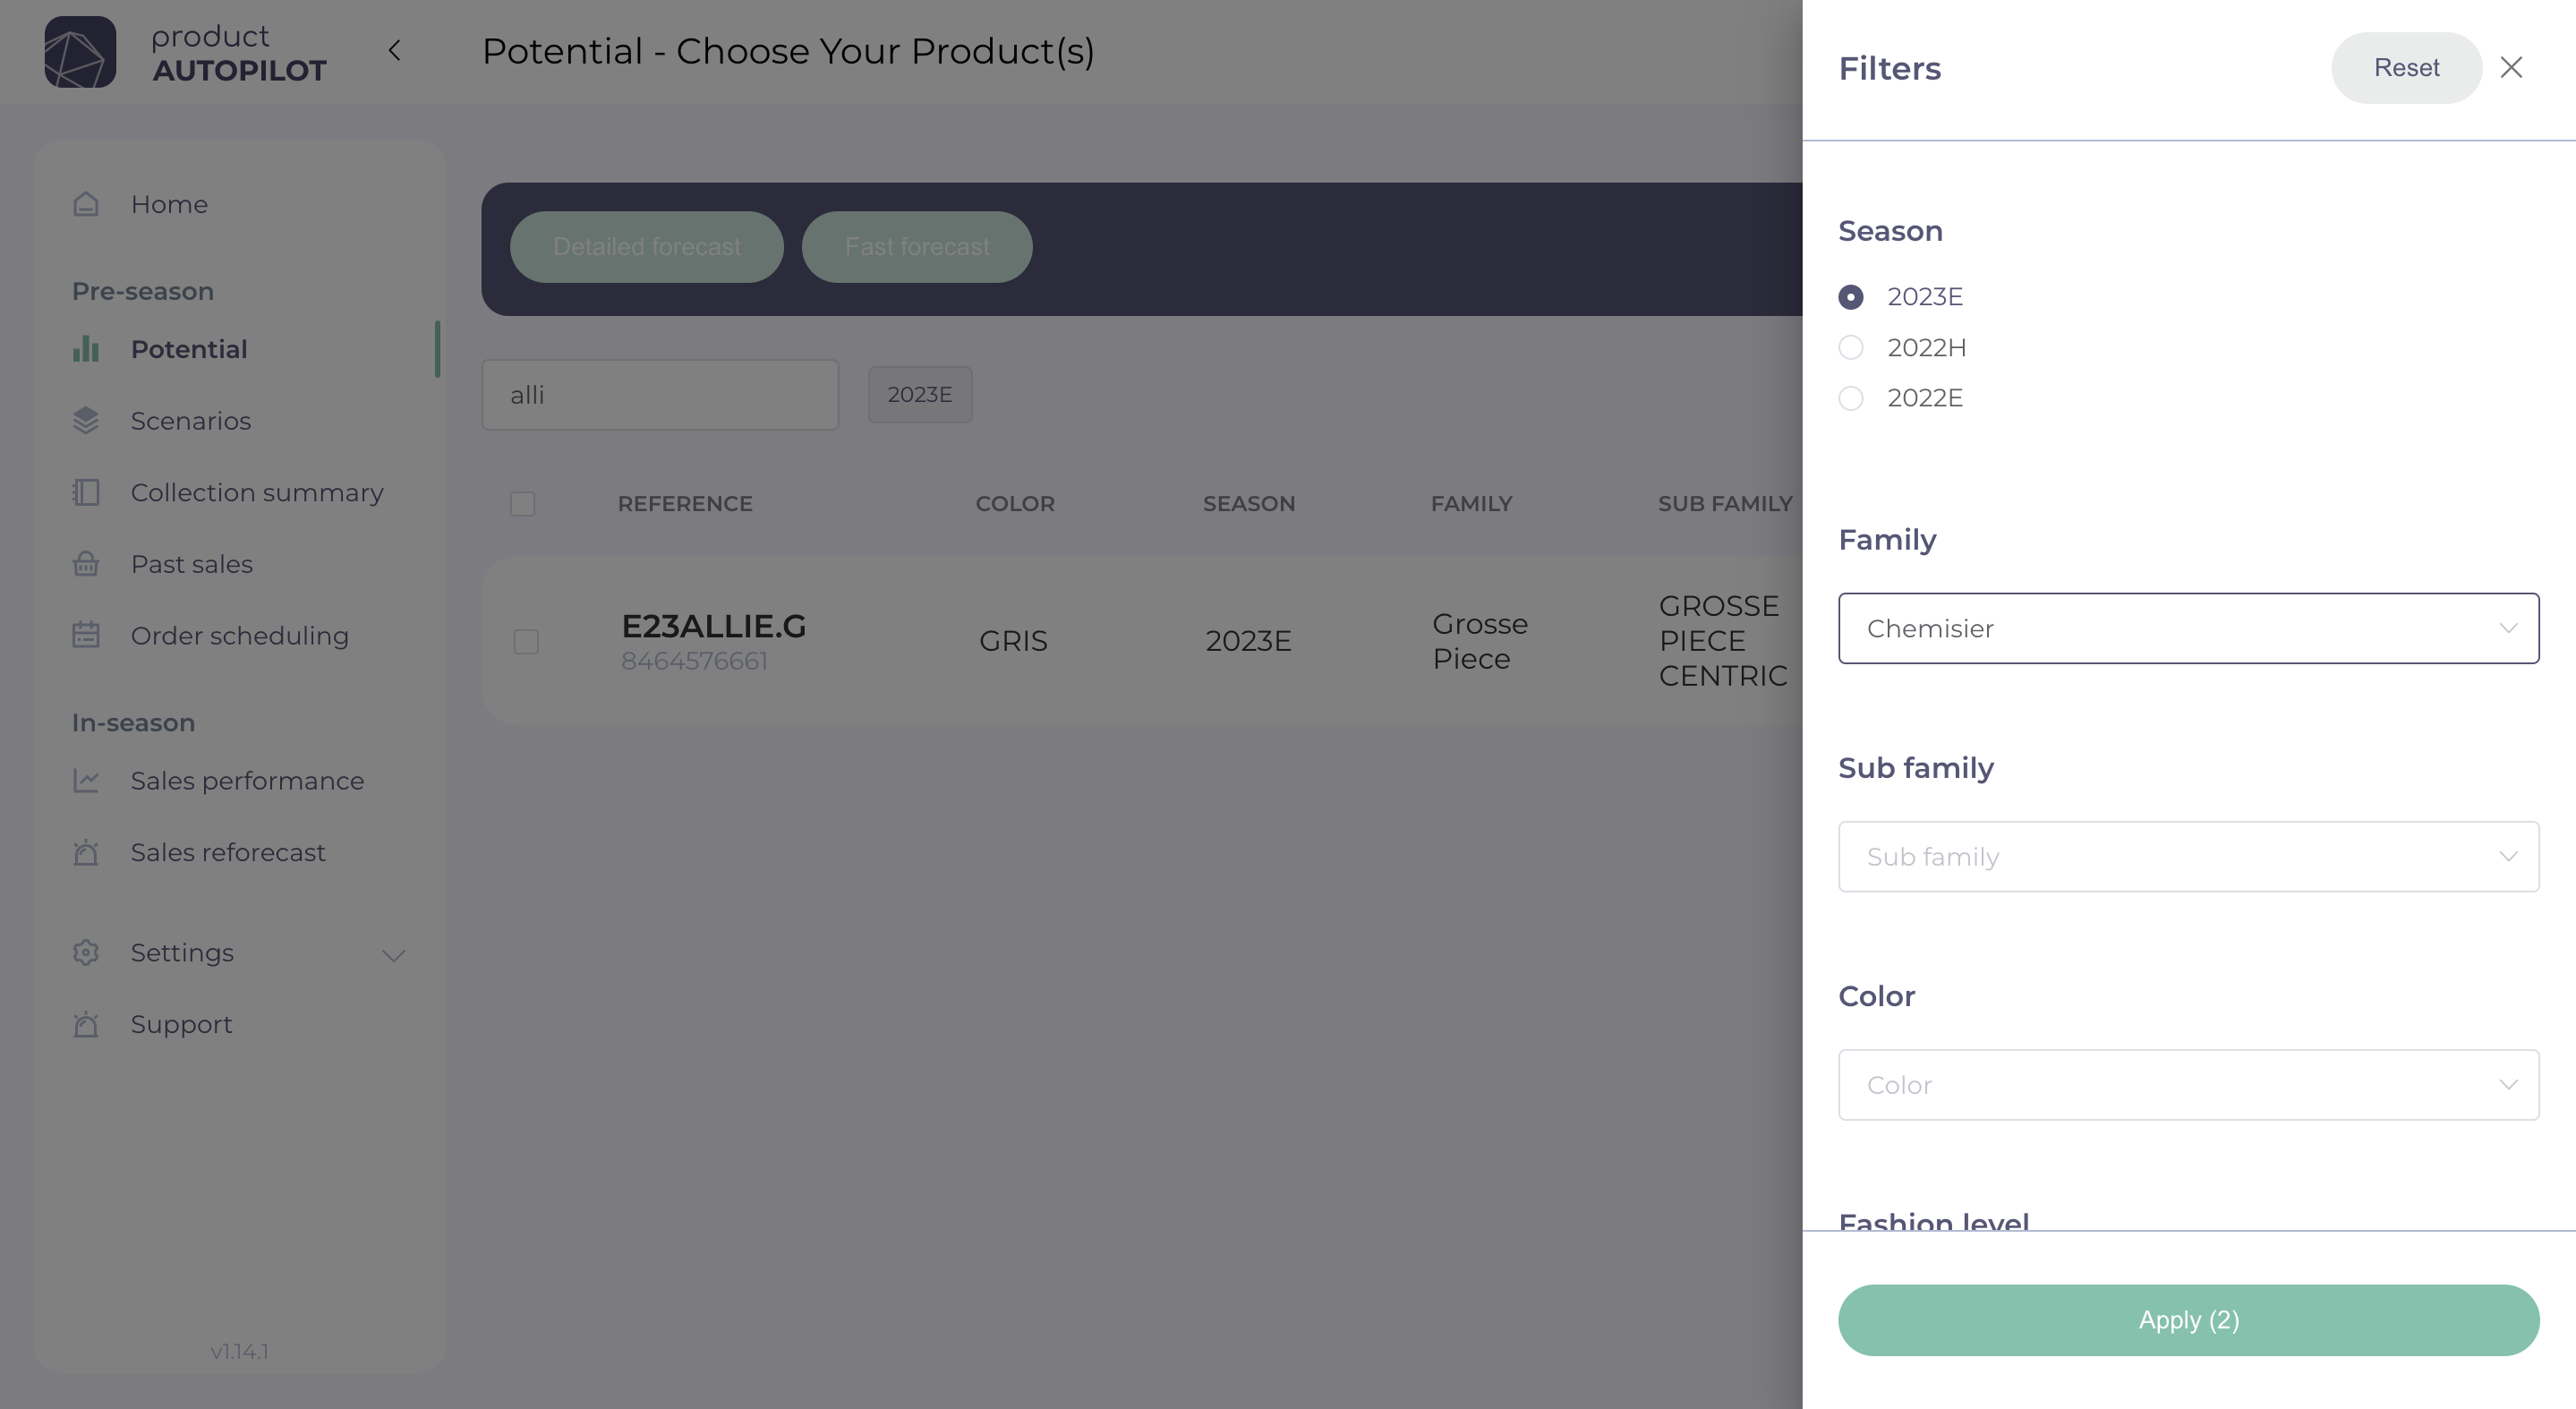
You can also open the filters by pressing the "Filters" field in the banner above the listing. You can then filter on another season, a family, a sub-family, a color or a fashion level.
Finally, to select the product on which to make a forecast, simply check it. You will then find it in your basket at the top.
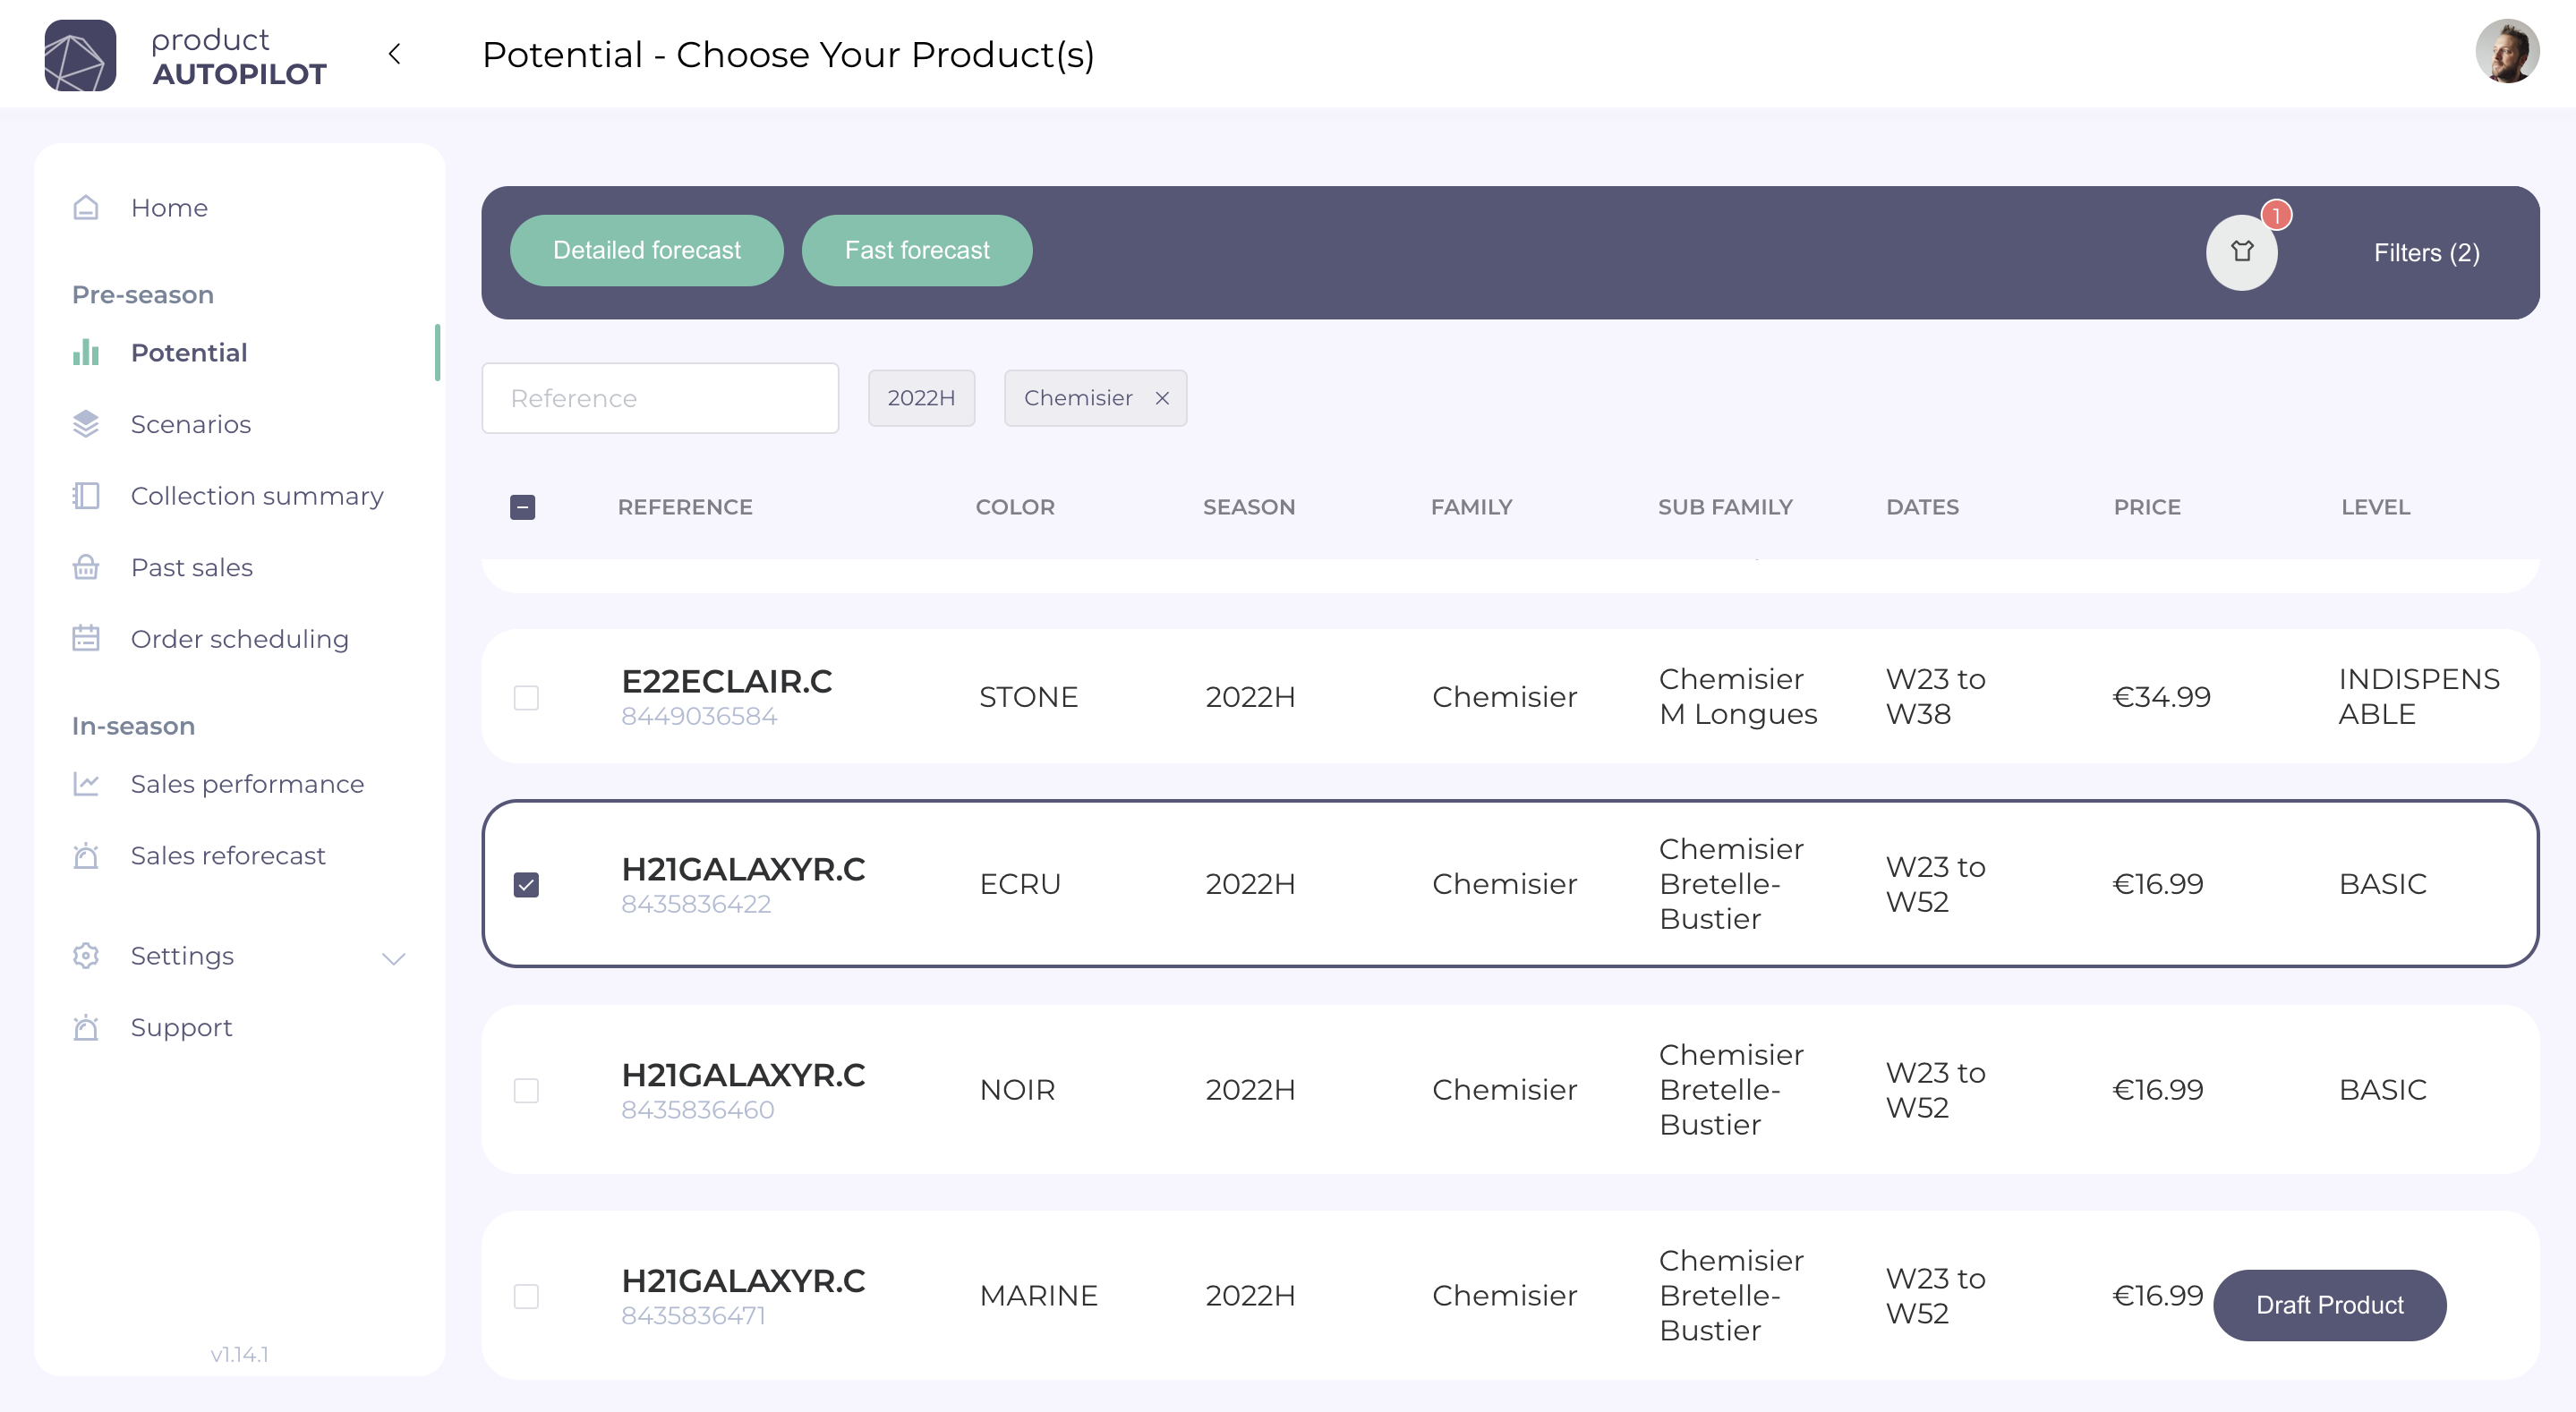
When you choose only one product, you will have the possibility to make a detailed forecast, when you choose several products, you will have the possibility to make a quick forecast.
(NOTE: Here we will focus on the detailed forecast. To learn how to make a Fast Forecast, please refer to the article "How to make a quick forecast?" ici)
2. Choose my comparable products
When you start your detailed forecast, you will be taken to the Product Matching page. The purpose of this page is to suggest products similar to the model you want to plan.
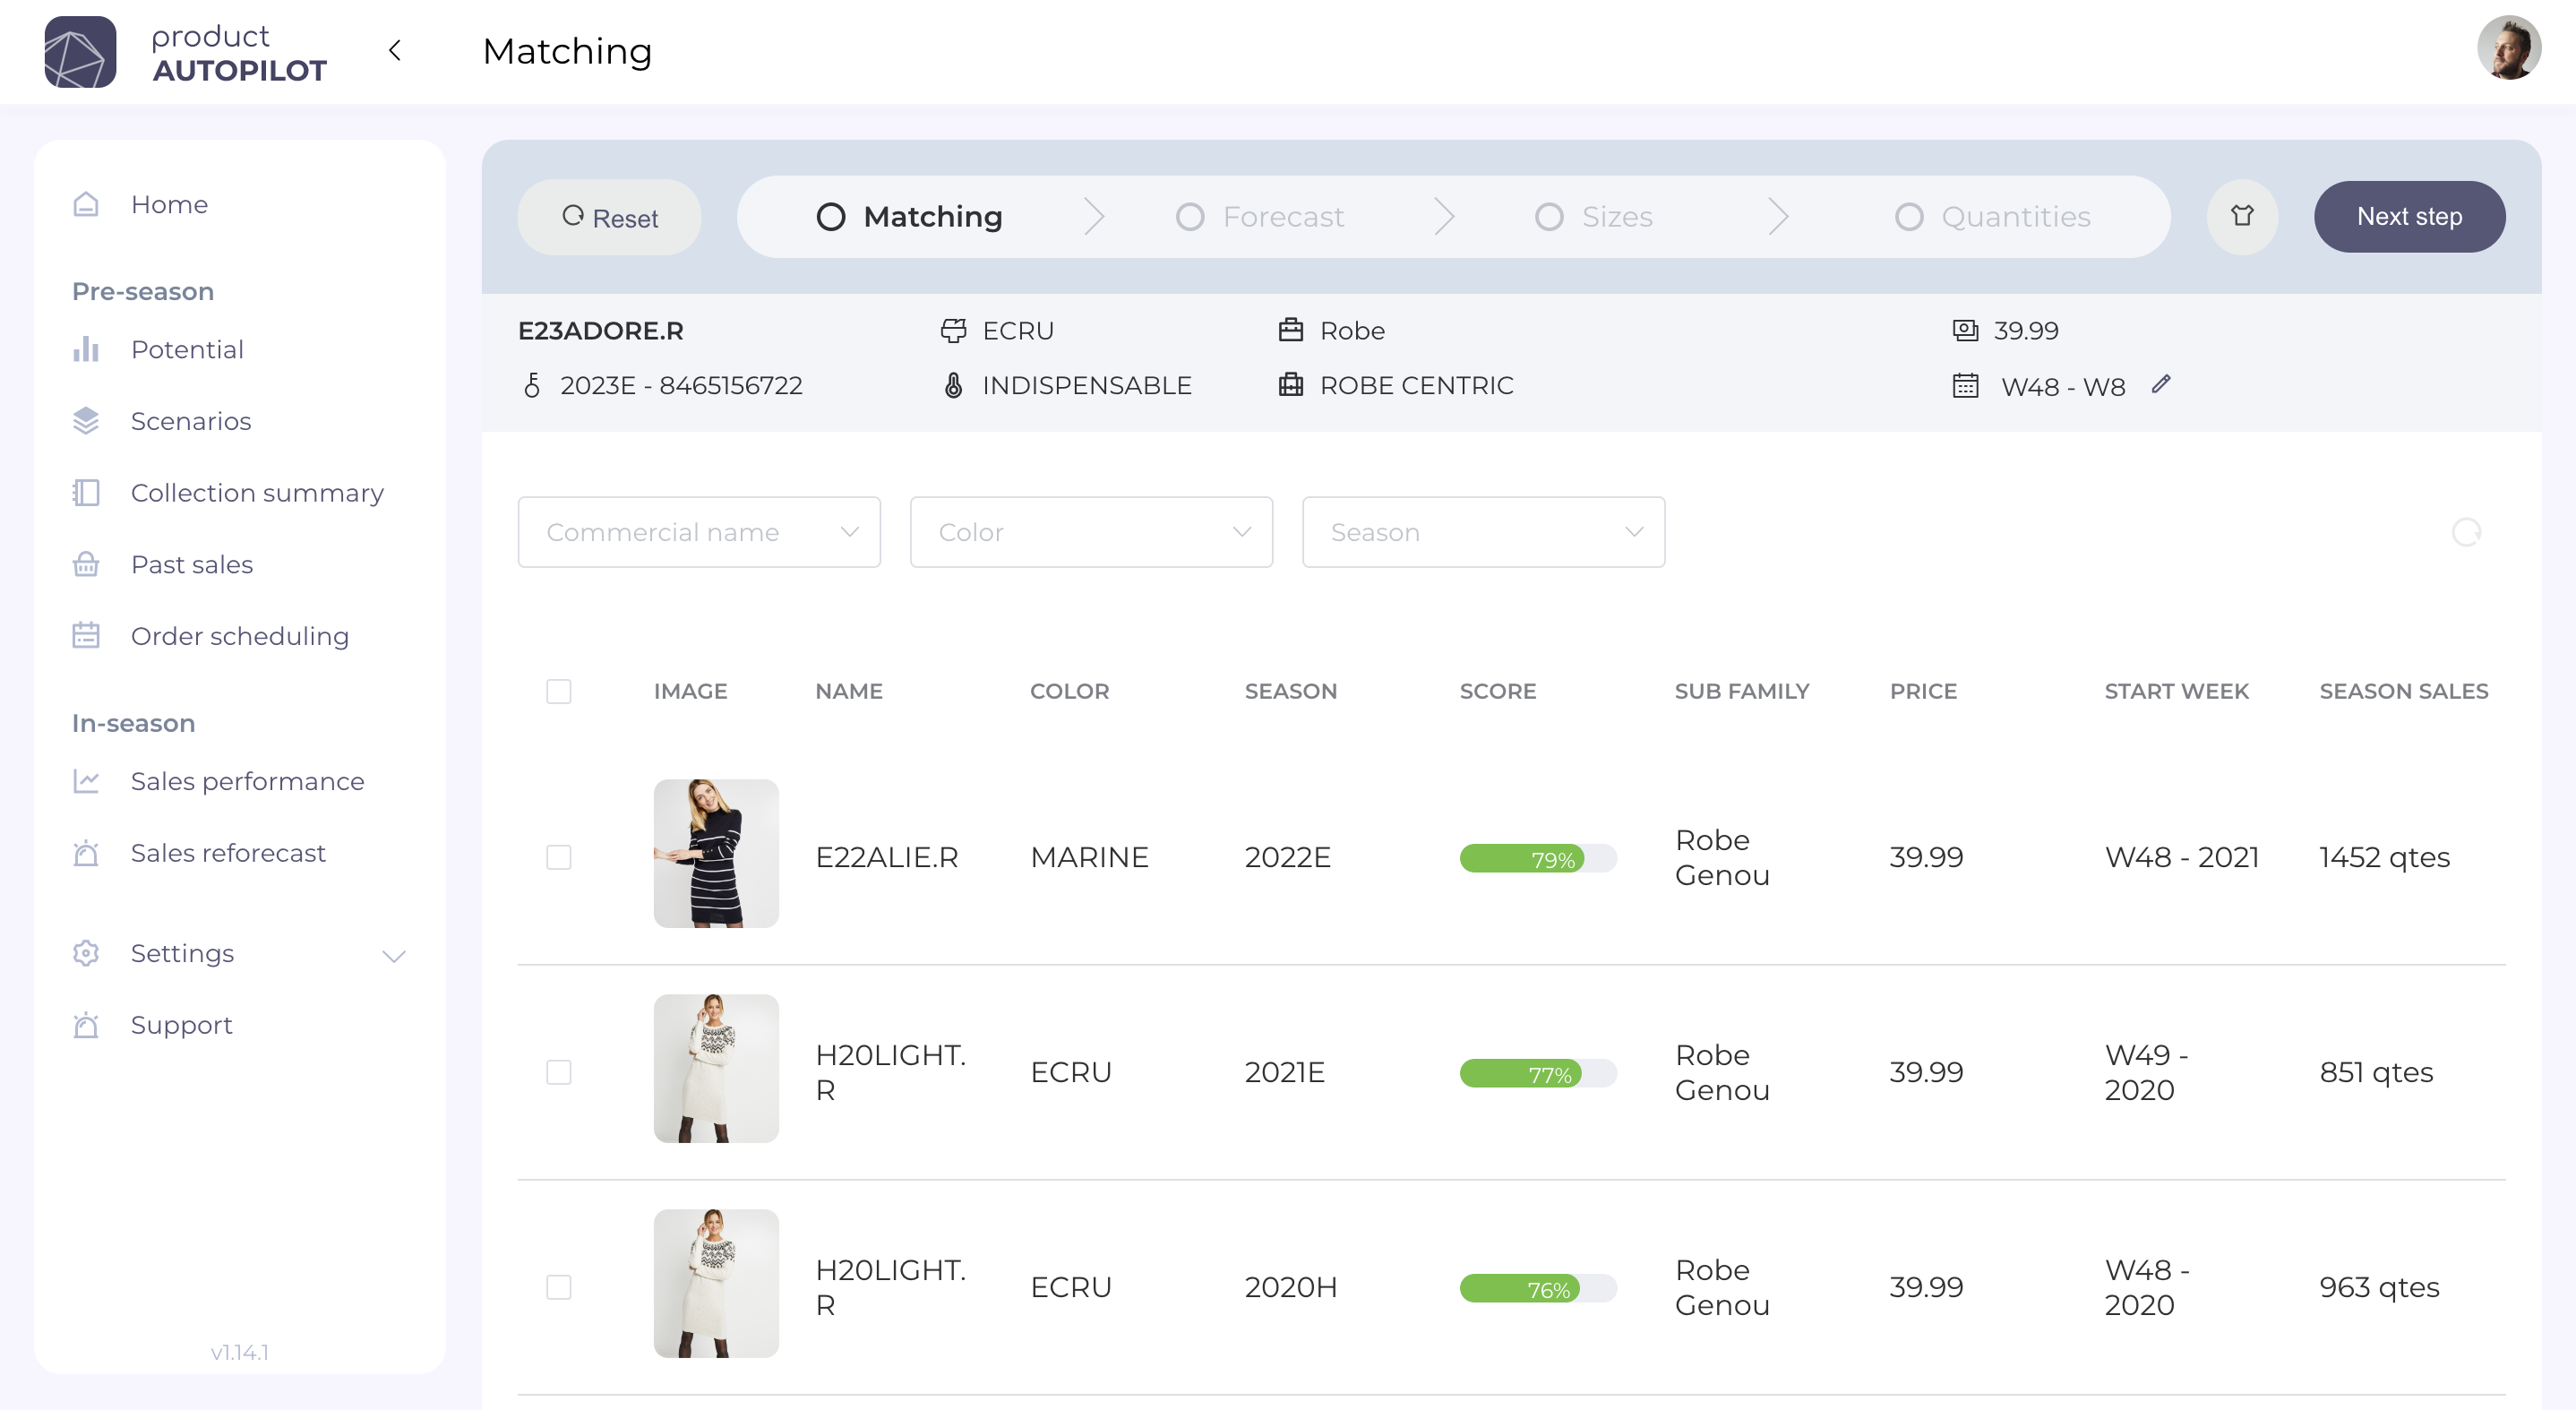
Products are sorted on the similarity score. The closer the score is to 100%, the more similar the known attributes of the products are and the closer the marketing dates are.
(NOTE: For more information on how this similarity score is calculated, please refer to the article "How are comparable products calculated?")
By clicking on the photo of a particular product, you can access past sales of that product:
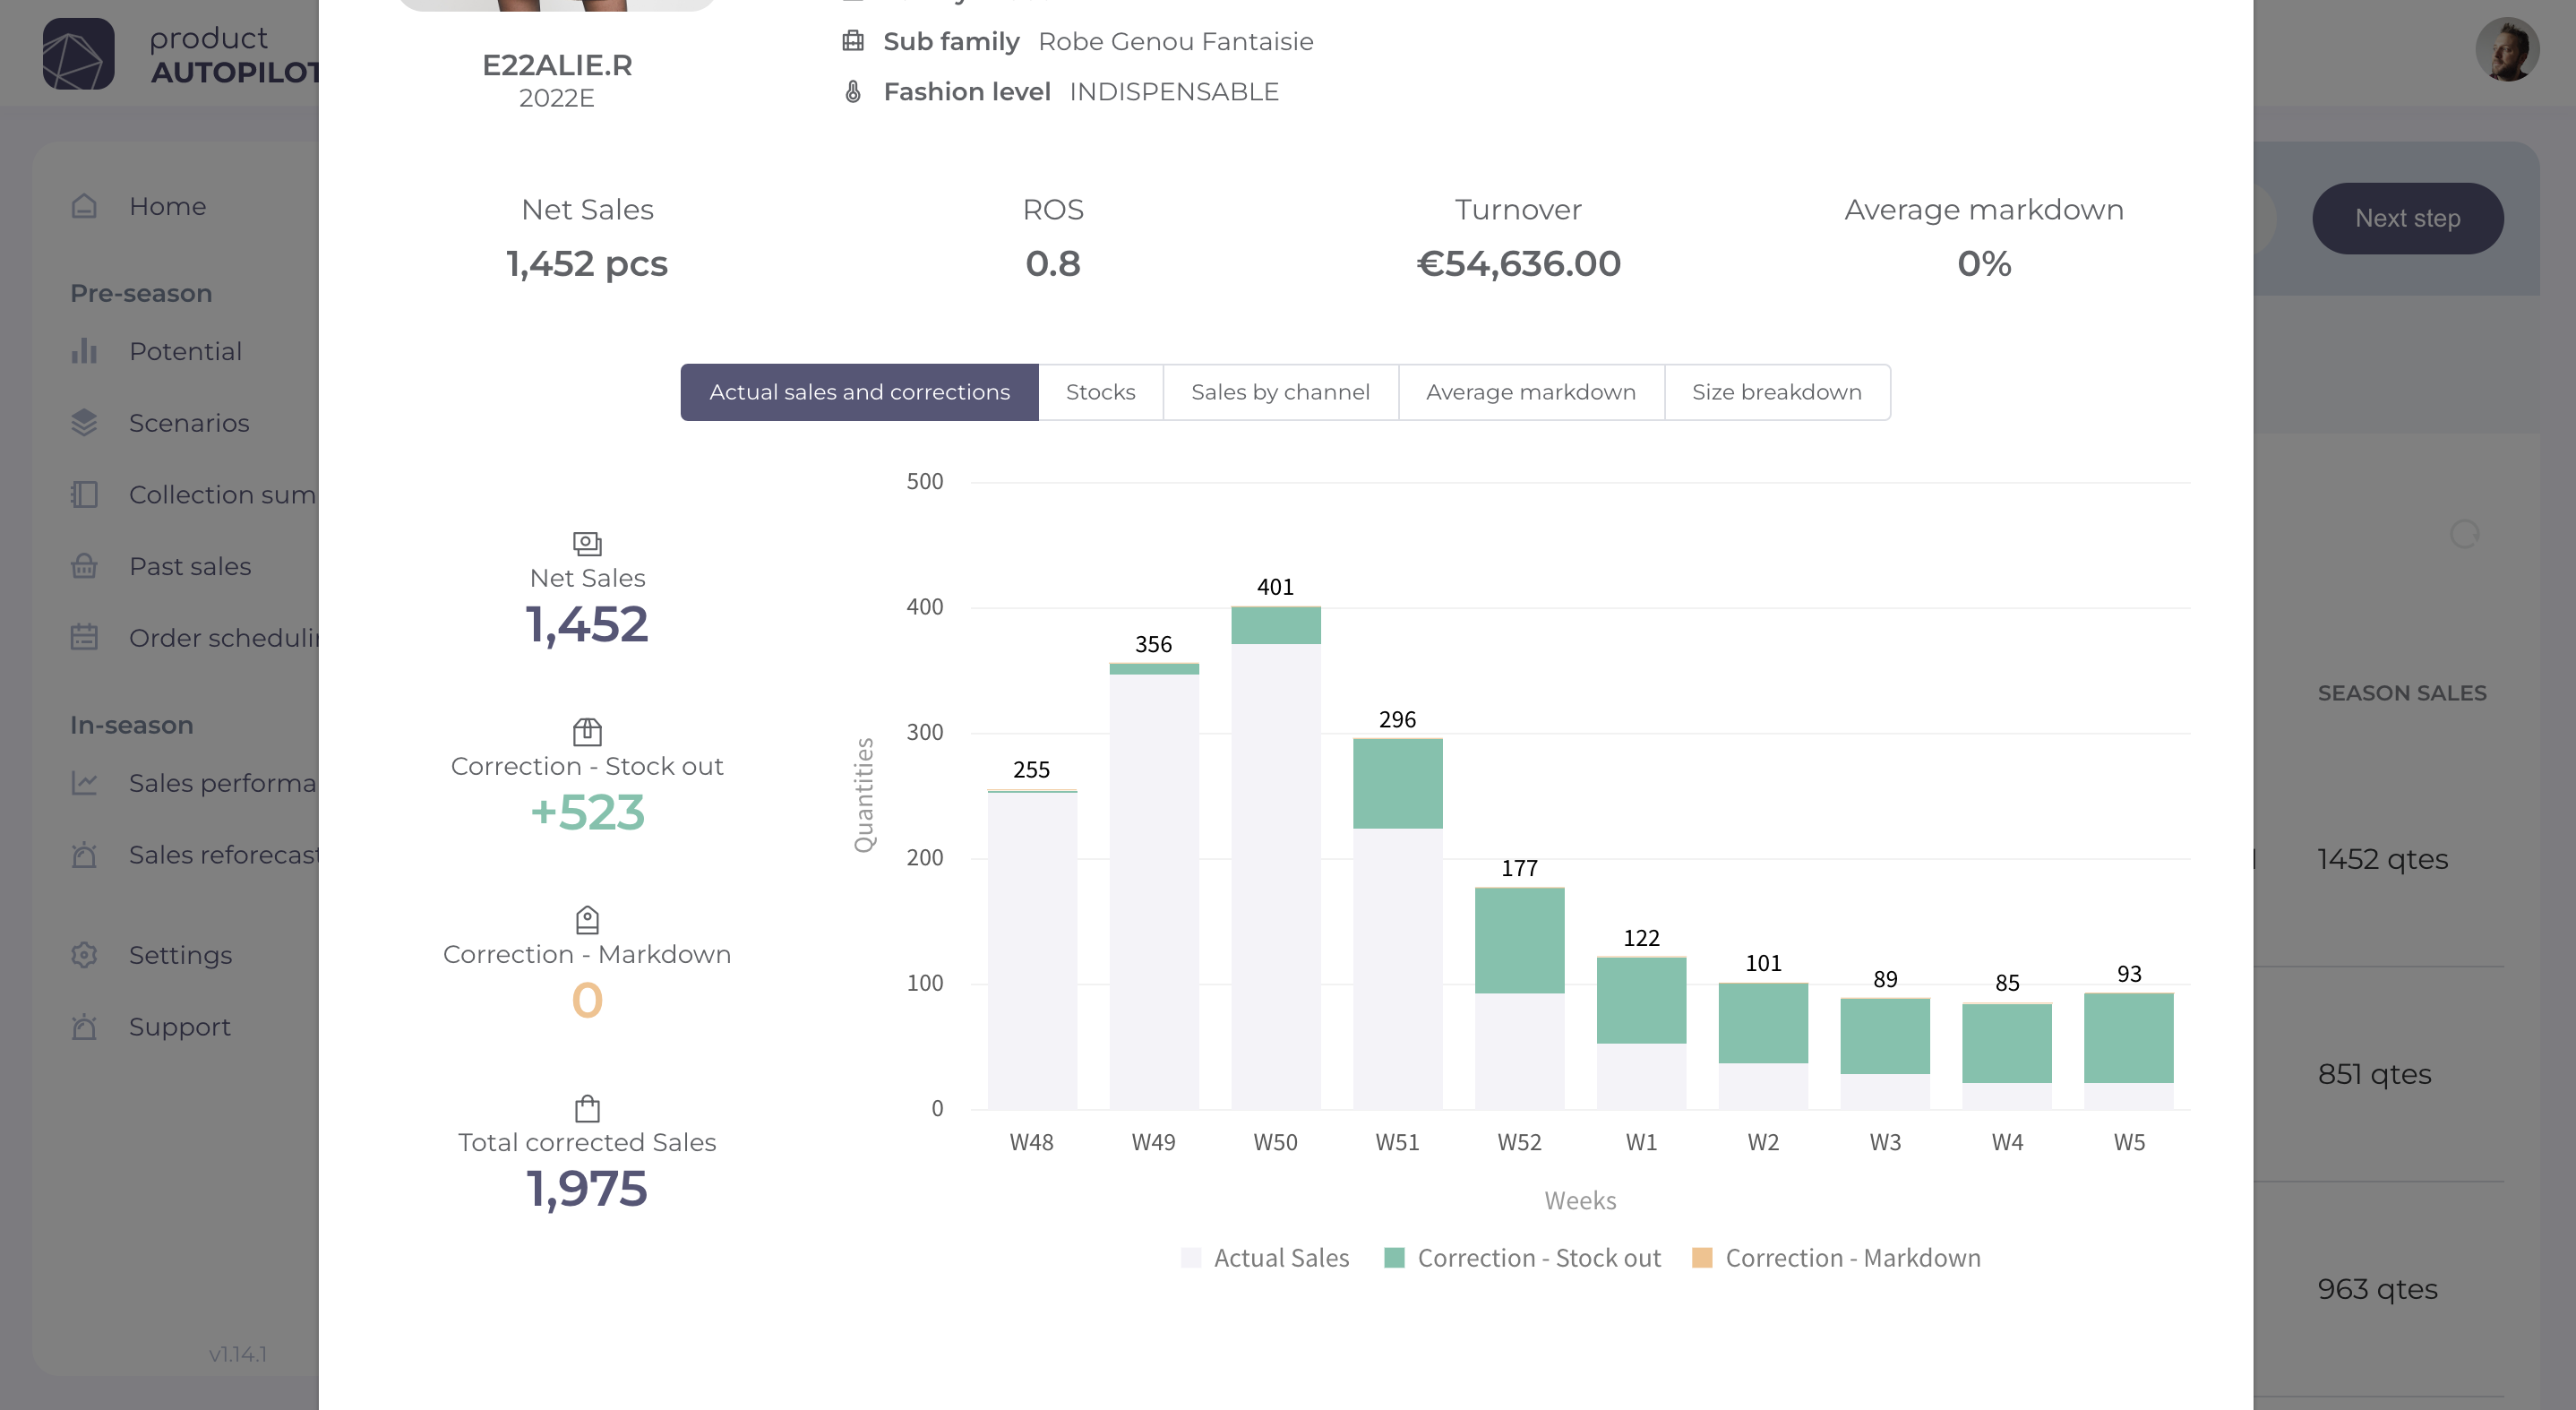
You can focus on:
- the actual and corrected sales of the product over its lifetime
- details of the product's inventory over the season (warehouse, store)
- sales by channel
- the average discount granted to customers
- the distribution of sales by size, as a whole and corrected for breakage and promotion effects.
You can then choose one or more comparable products for your reference to plan. To do this, simply check them off in the list.
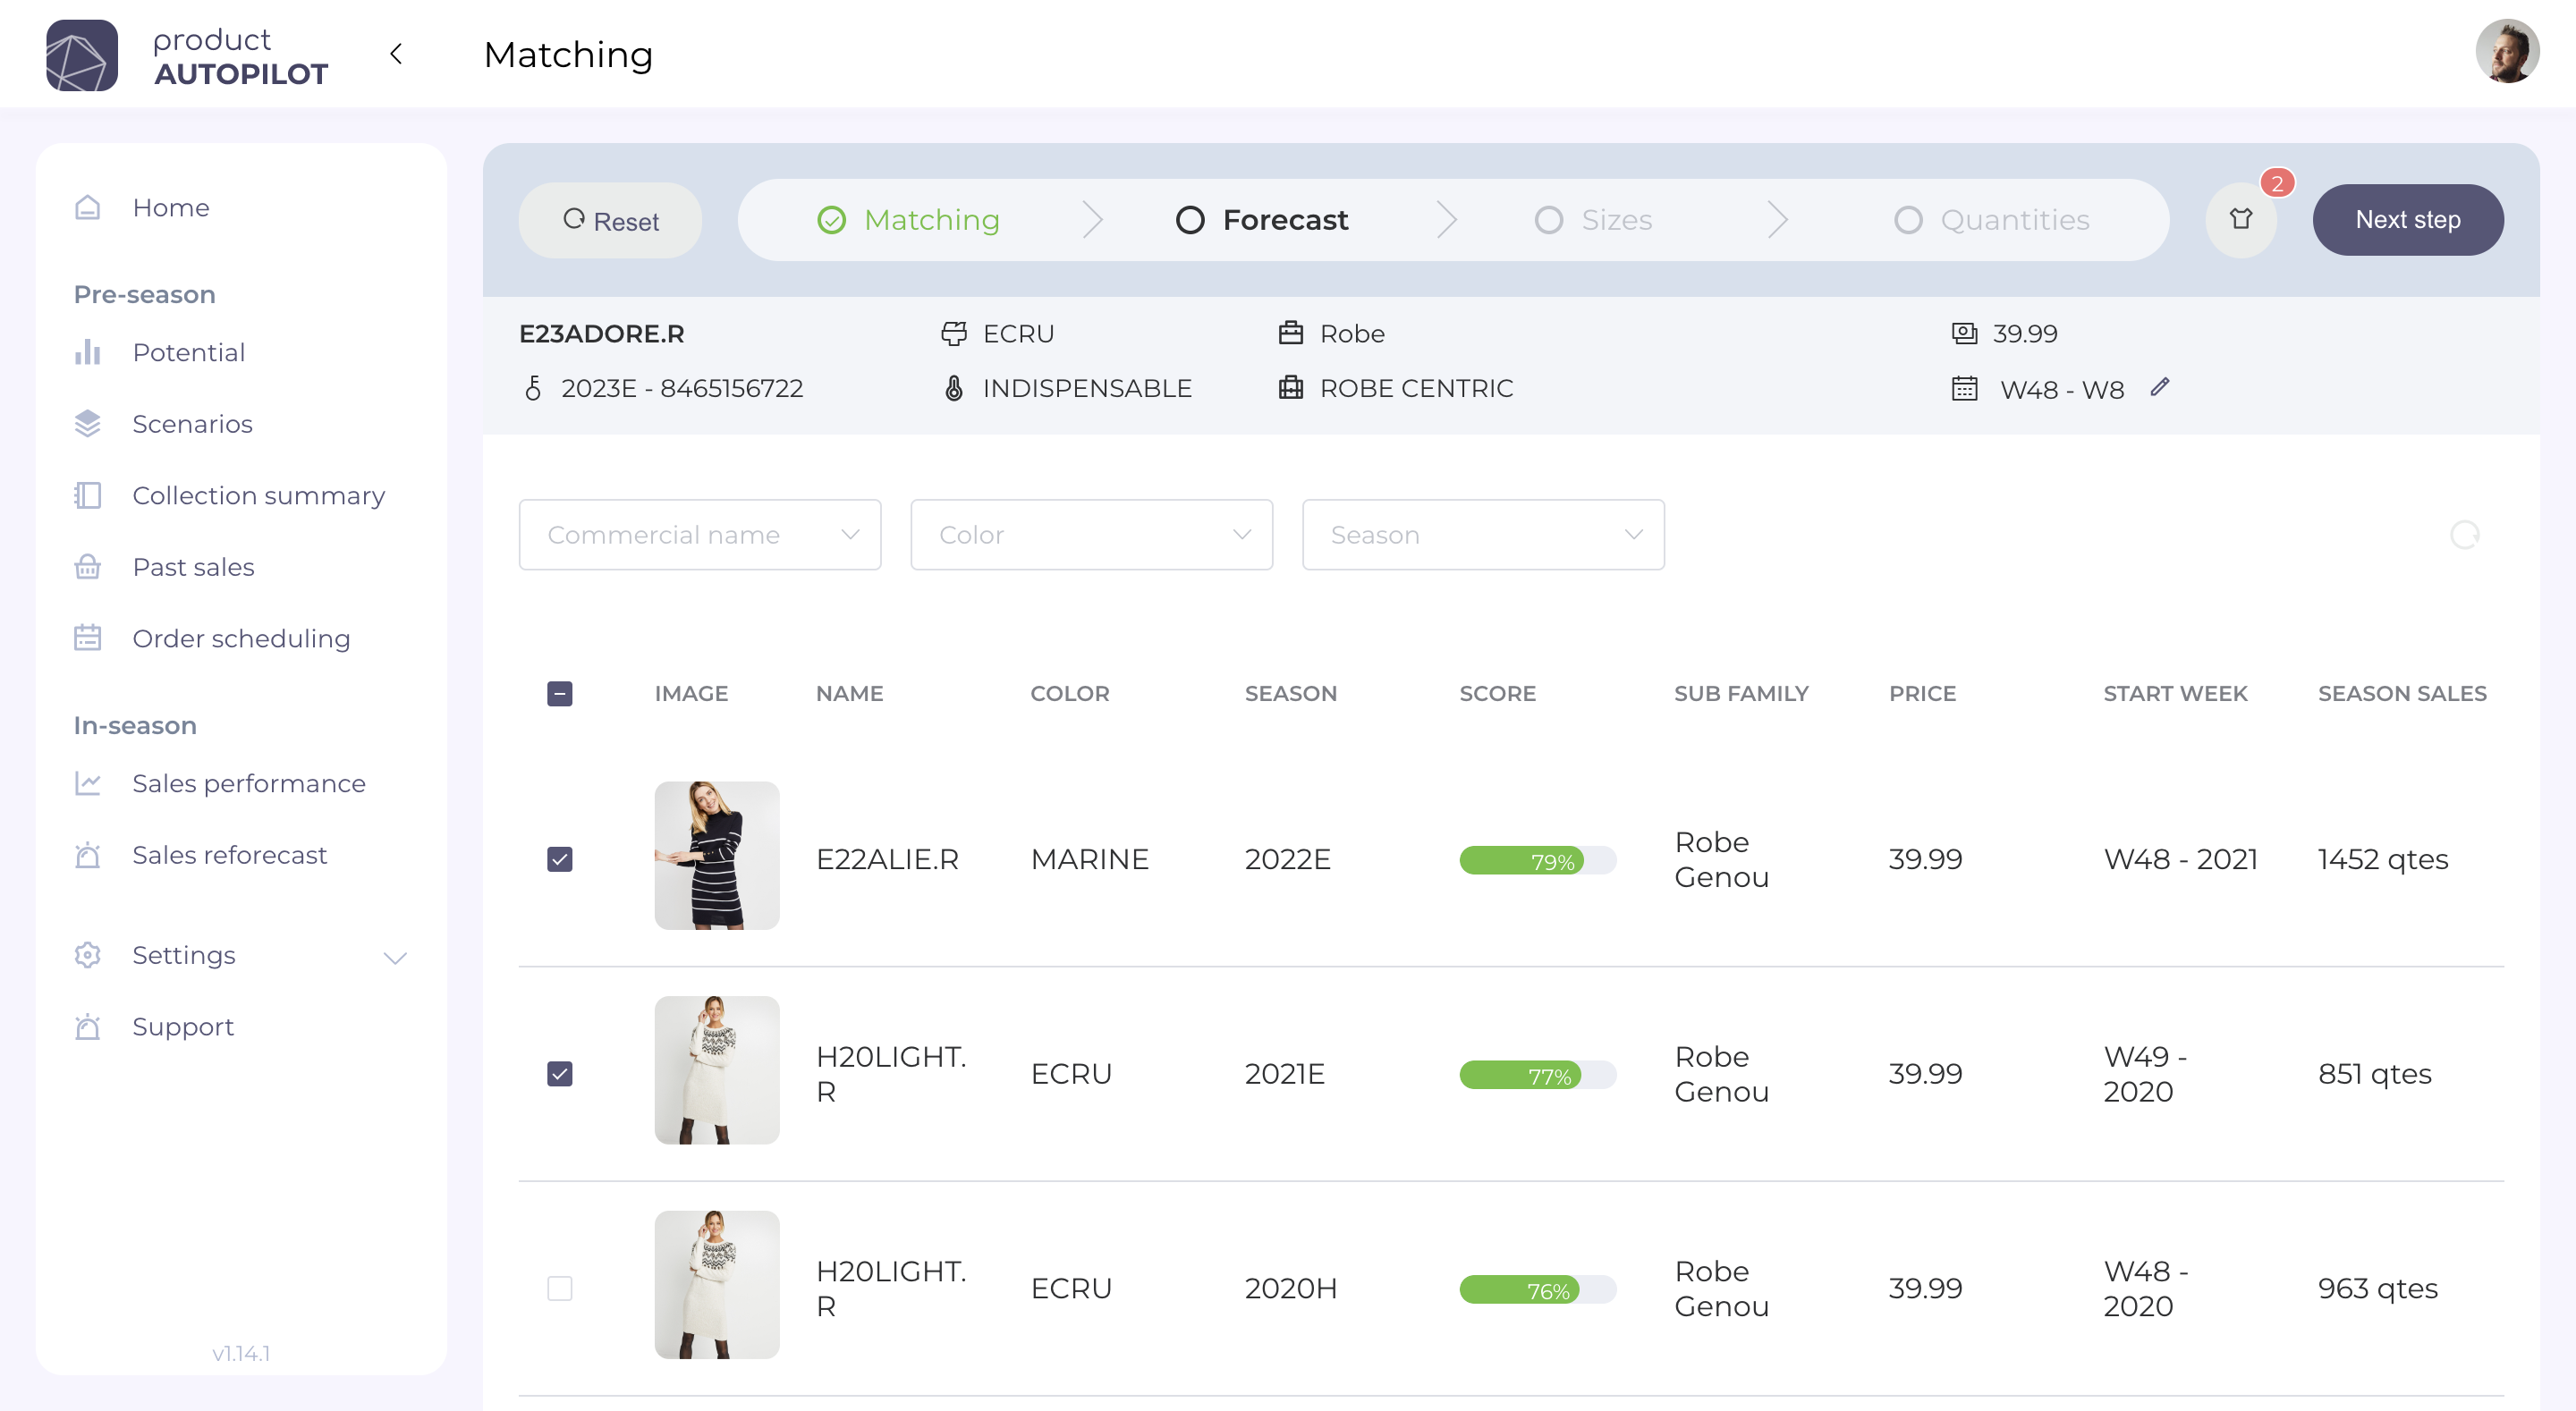
You will then find these products in your cart to be able to access them on the following steps. On this basket, you can then update the selected products by deleting them one by one or globally.

Once you are satisfied with the selection of products, you can proceed to the next step by pressing "Next step".
3. Forecasting sales at reference/color level
Based on the products you have selected in the comparable products selection step, our algorithms automatically propose you a sales forecast for the whole season.
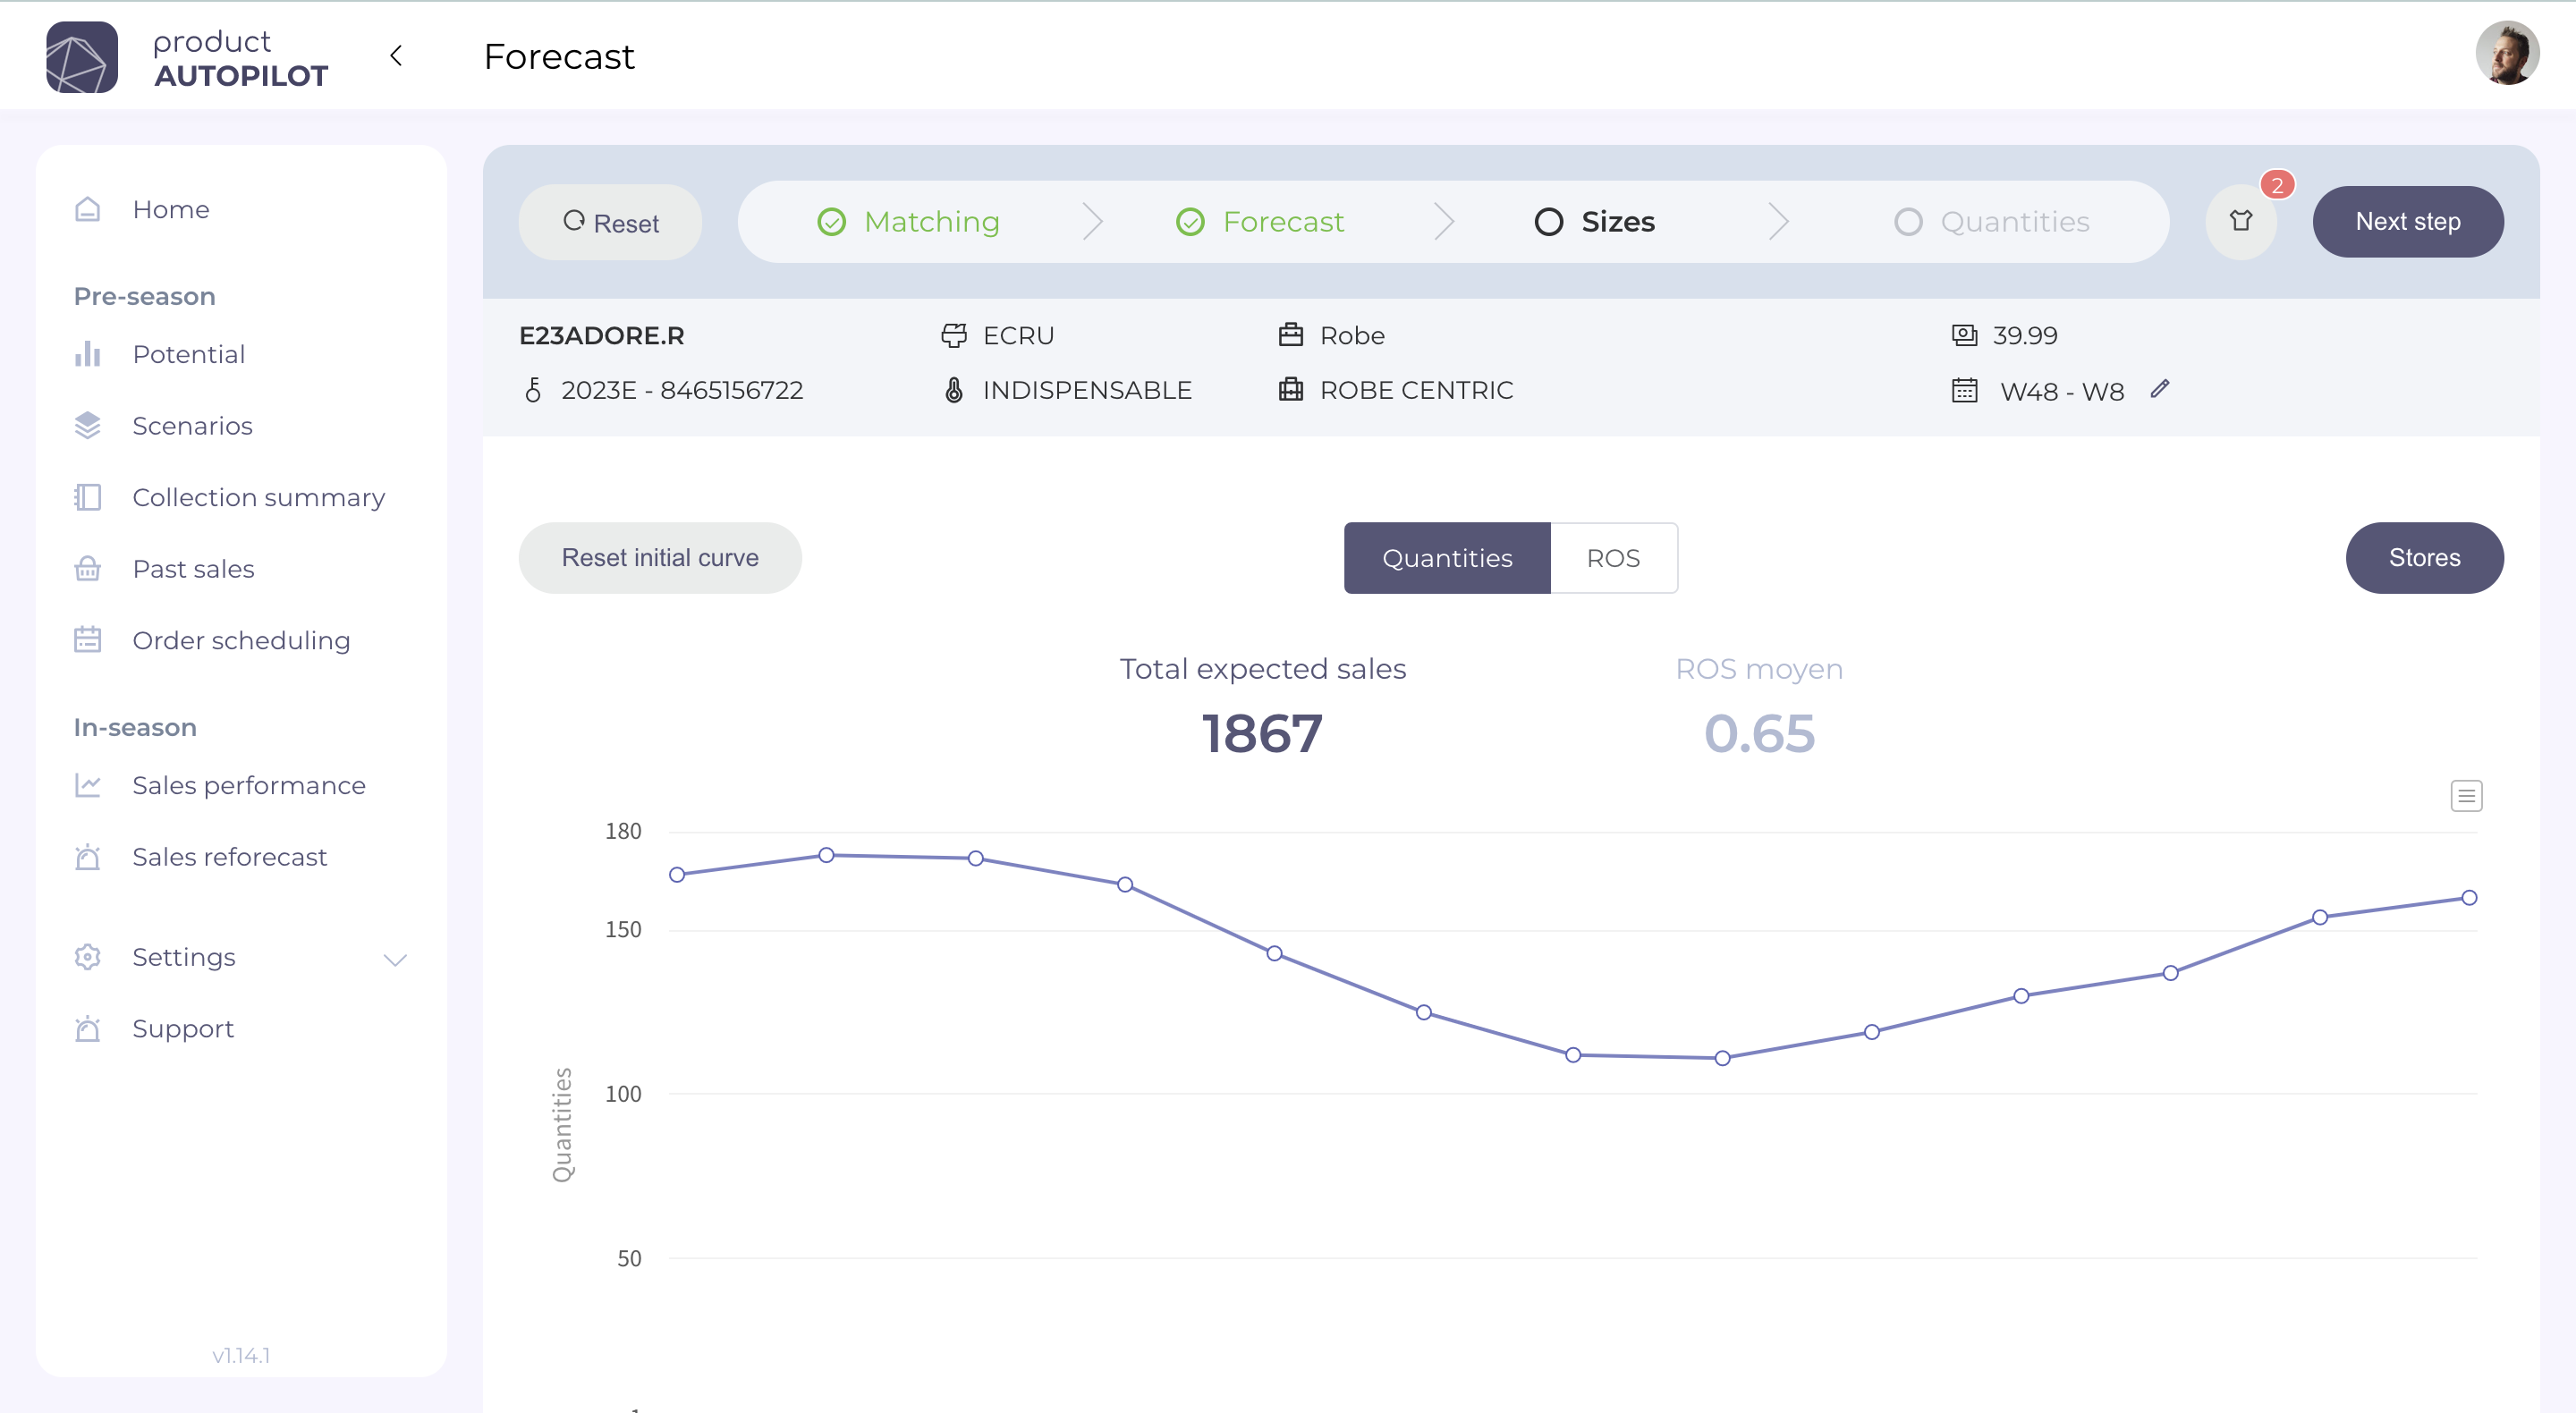
This forecast takes into account various factors, such as:
- the seasonality of sales
- the increase in visitor flow
- the number of stores
- clusters / groups of stores
- past sales of the family / sub-family / fashion level corresponding to the product to be planned.
(NOTE: For more details on the forecasting model, please refer to the article "How does the sales forecasting algorithm work?")
Change the clusters of stores in which to sell my new product
By pressing the "Stores" button, you can access a window in which you can set the groups of stores in which you want to sell your product for the chosen season.
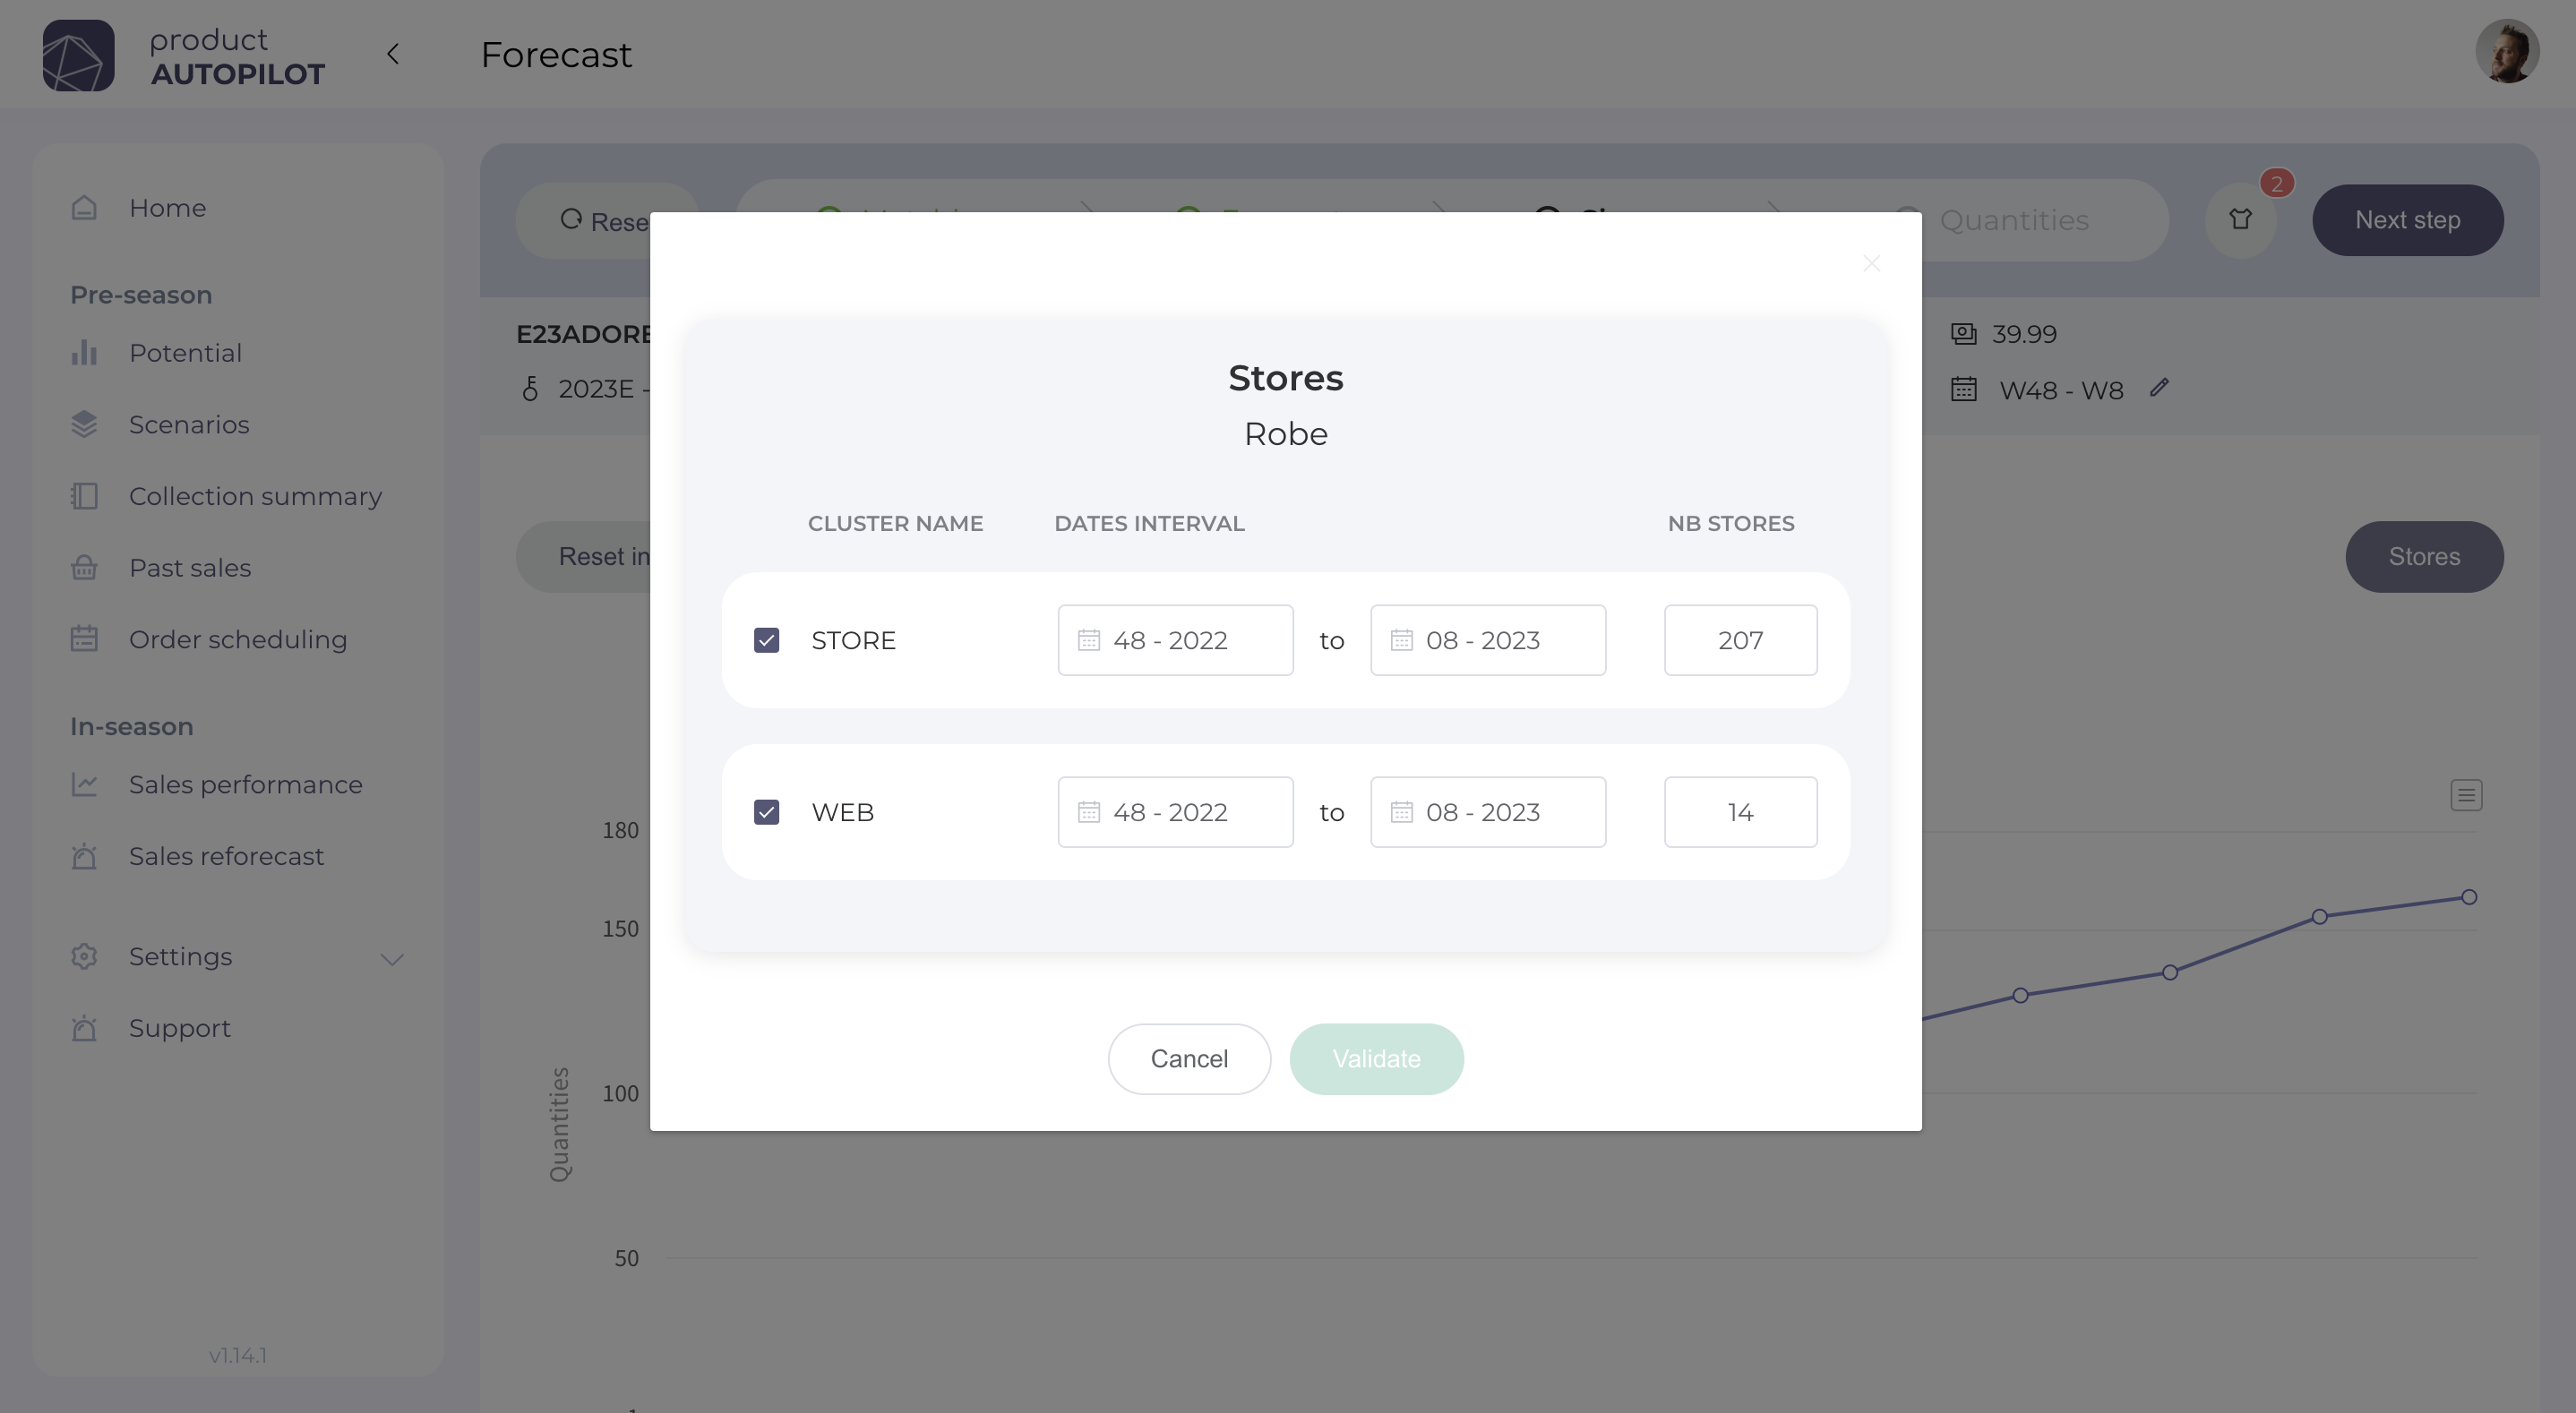
Here there are only 2 groups (Retail / Web), but there can be as many groups as you want.
Add a growth to my forecast
Depending on your choices, it is potentially interesting to add a growth in the forecast.
Be careful, this growth does not make sense here for a growth in the number of stores (because you can directly change the number of stores in the "Stores" window). It has a meaning when it is a question of a modification of the assortment, of the promotion of the products in store, or of the taking into account of a fashion trend for example.
You can then, below the graph, enter a growth (evolution). This can be positive or negative and is taken into account in %. This growth will then be applied to the whole forecast, week by week.
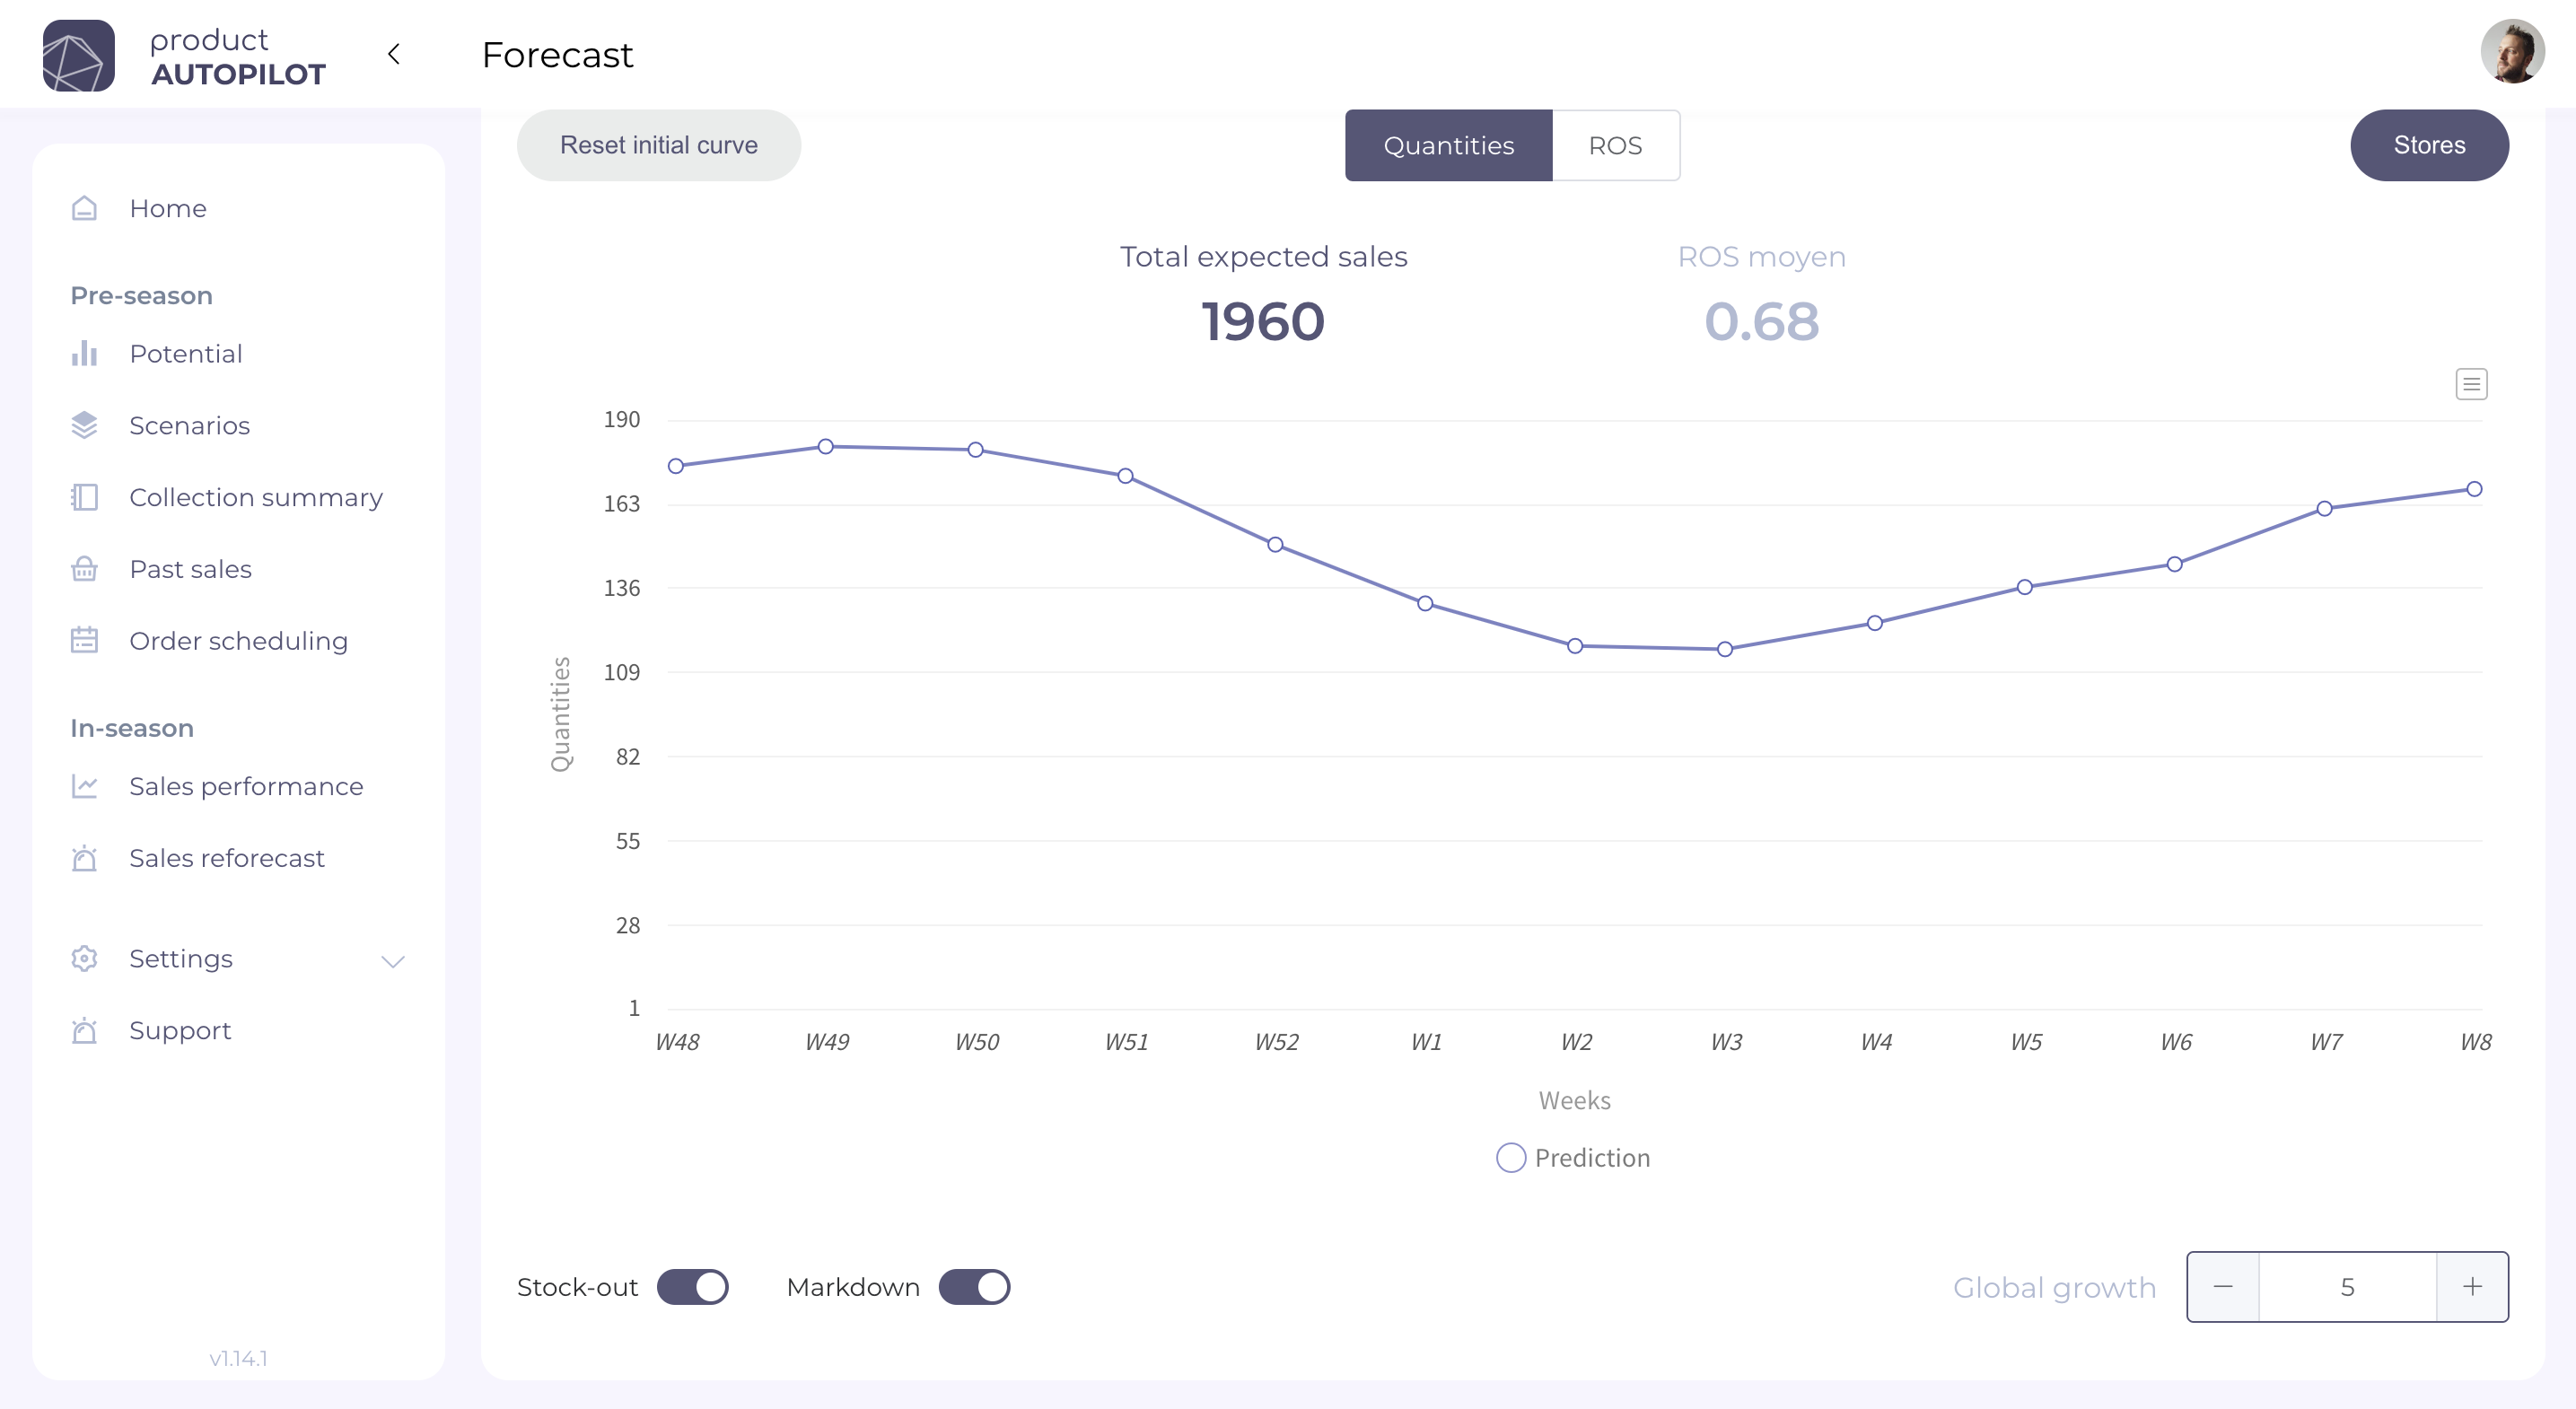
Once I am satisfied with my forecast, I can move on to the next step to plan my quantities to size.
4. Plan my size distribution
On the "Sizes" tab, I can forecast my size grid and adjust the distribution of forecasted sales by size.
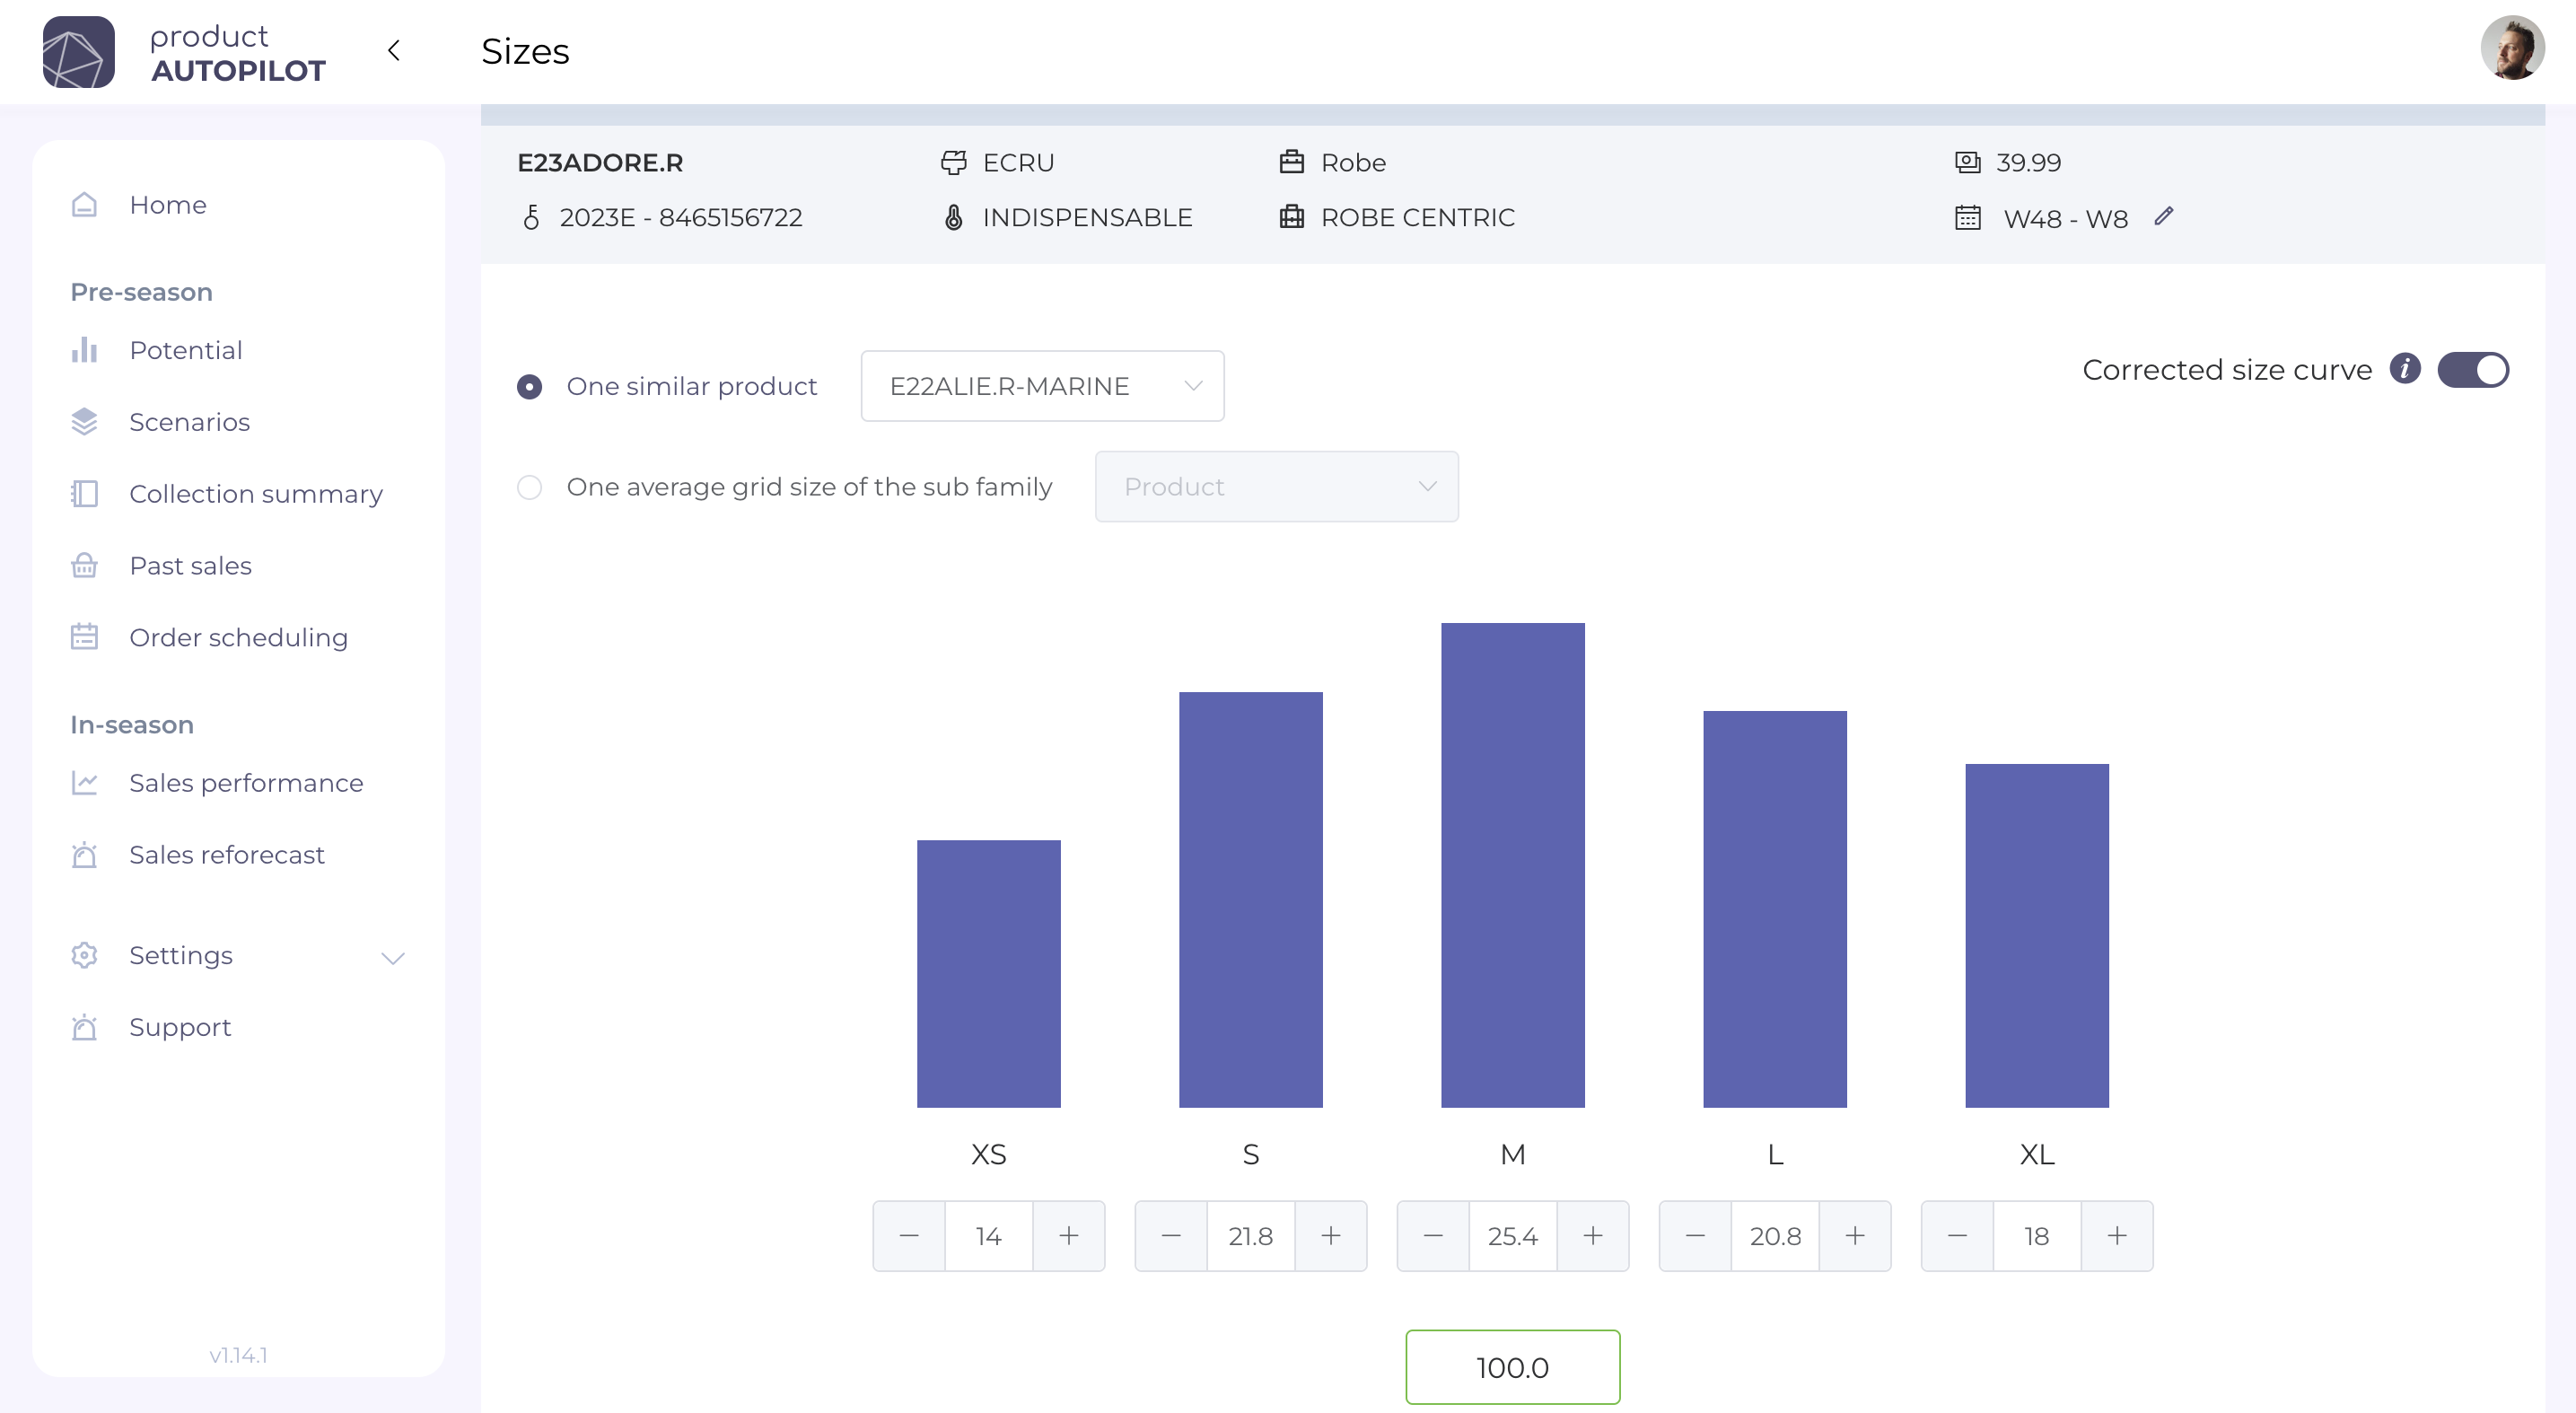
Choose my size grid
You have 2 ways to choose the size grid for your new product:
- the one of a comparable product you have selected
- an average size grid of the sub family of your product.
We recommend to take a medium size grid when you don't really know how your new model will behave. On the other hand, if it is very close to one of the chosen comparable products, it is certainly preferable to choose the grid size of this comparable product.
Adapting my distribution
Once you have chosen the size grid, you will see a size distribution that is proposed automatically. By default, the corrected size grid is proposed, i.e. the one calculated on the "Reference weeks".
(NOTE: For more information about reference weeks, please refer to the article "How are reference weeks calculated?")
It is always possible to deactivate this automatic correction. You will then have the distribution of the sizes sold over the whole season, without correction of out-of-stock items or promotions.
You can then manually modify the distribution, making sure that you are 100% overall, otherwise you will not be able to go to the next step.
When you are satisfied with your size distribution, you can click on "Next step" and go to the definition of the quantities to buy.
5. Define the quantities to buy for my product
This is the last step! Because you will never be able to sell exactly what you plan if you buy strictly the quantities you plan, it is necessary to optimize the quantities to buy according to different criteria
- your brand's target sell-through rate
- the quantities you plan to renew from one season to the next (in case of a renewed product)
- the minimum quantities to have in store.
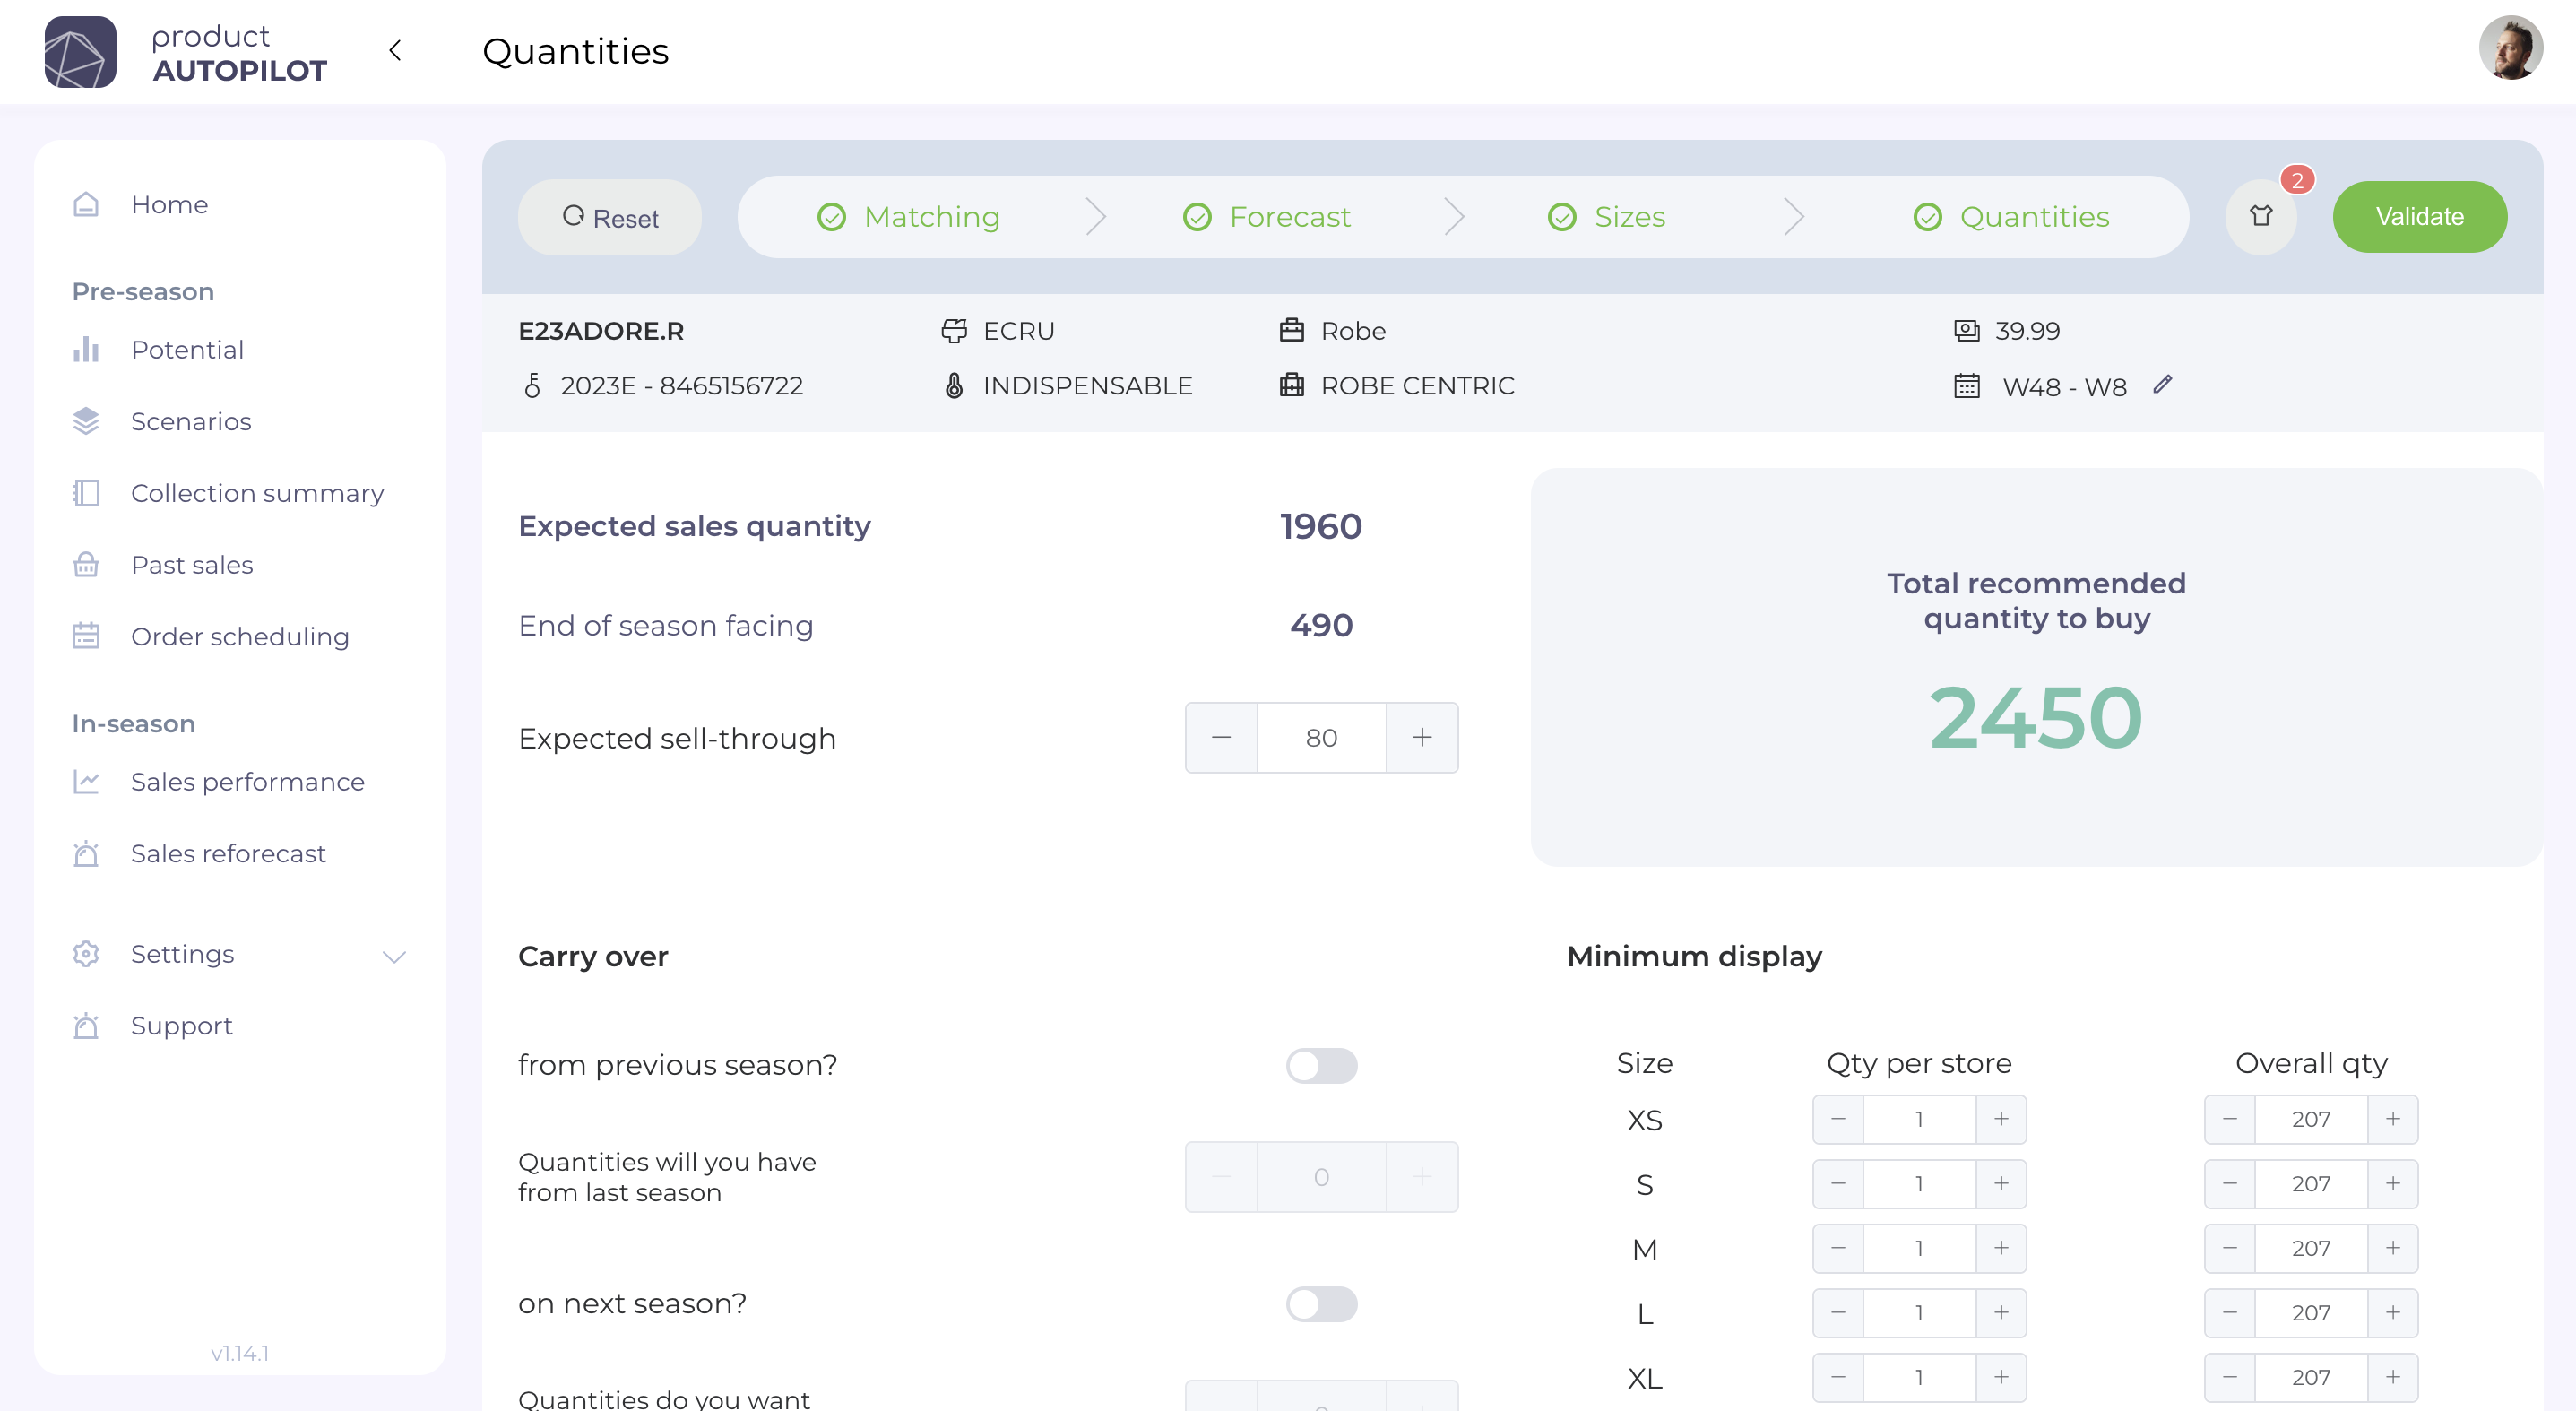
According to the different criteria, the total quantities to buy for my product are updated, here for example, 2450 pieces.
6. Save my scenario
Once you are satisfied with your scenario, you can then save it.
Product Autopilot allows for the creation of an unlimited number of scenarios per product, but in order to proceed to the "Order Scheduling" stage, or for it to be taken into account for the season, it must be validated. Only one scenario can be validated per season.
Give your scenario a name so that you can find it easily. And enter a comment if you need to.
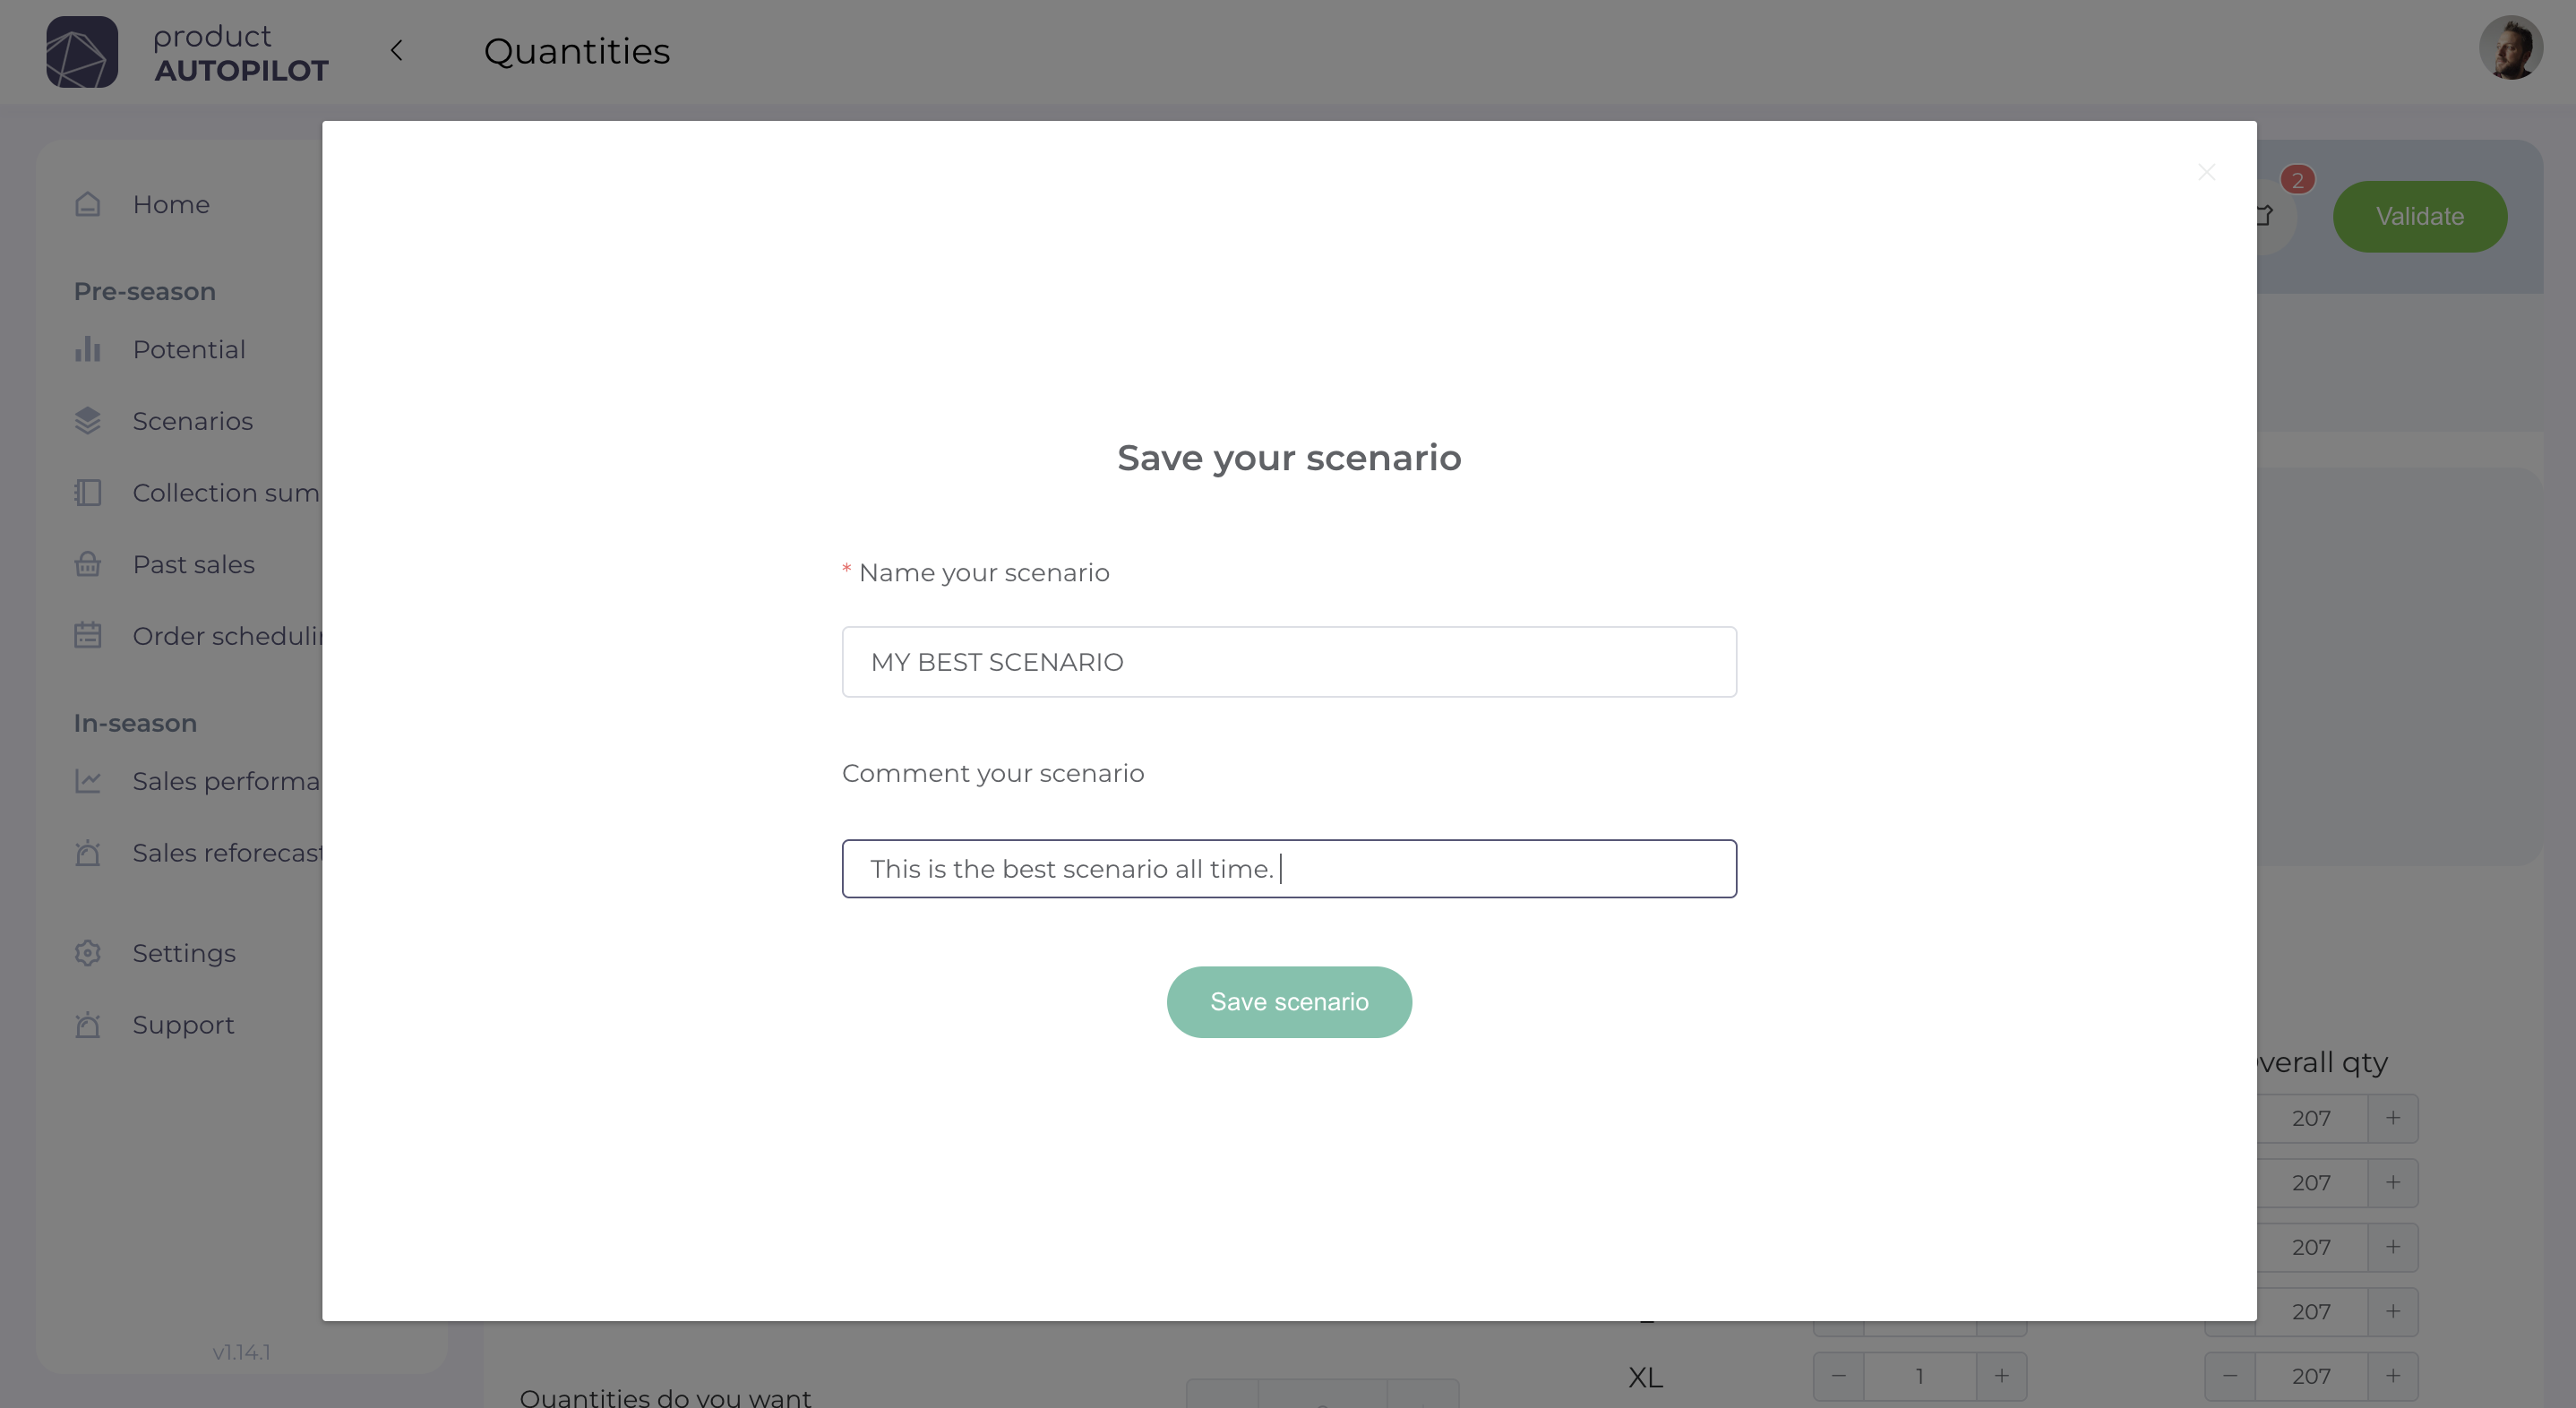
Finally, you will be offered a quick access to several actions to perform:
- Create a new scenario (you will come back to the beginning)
- Compare the different scenarios created for this product
- Validate and go to the aggregated view page.
- Validate and go to the order scheduling page.
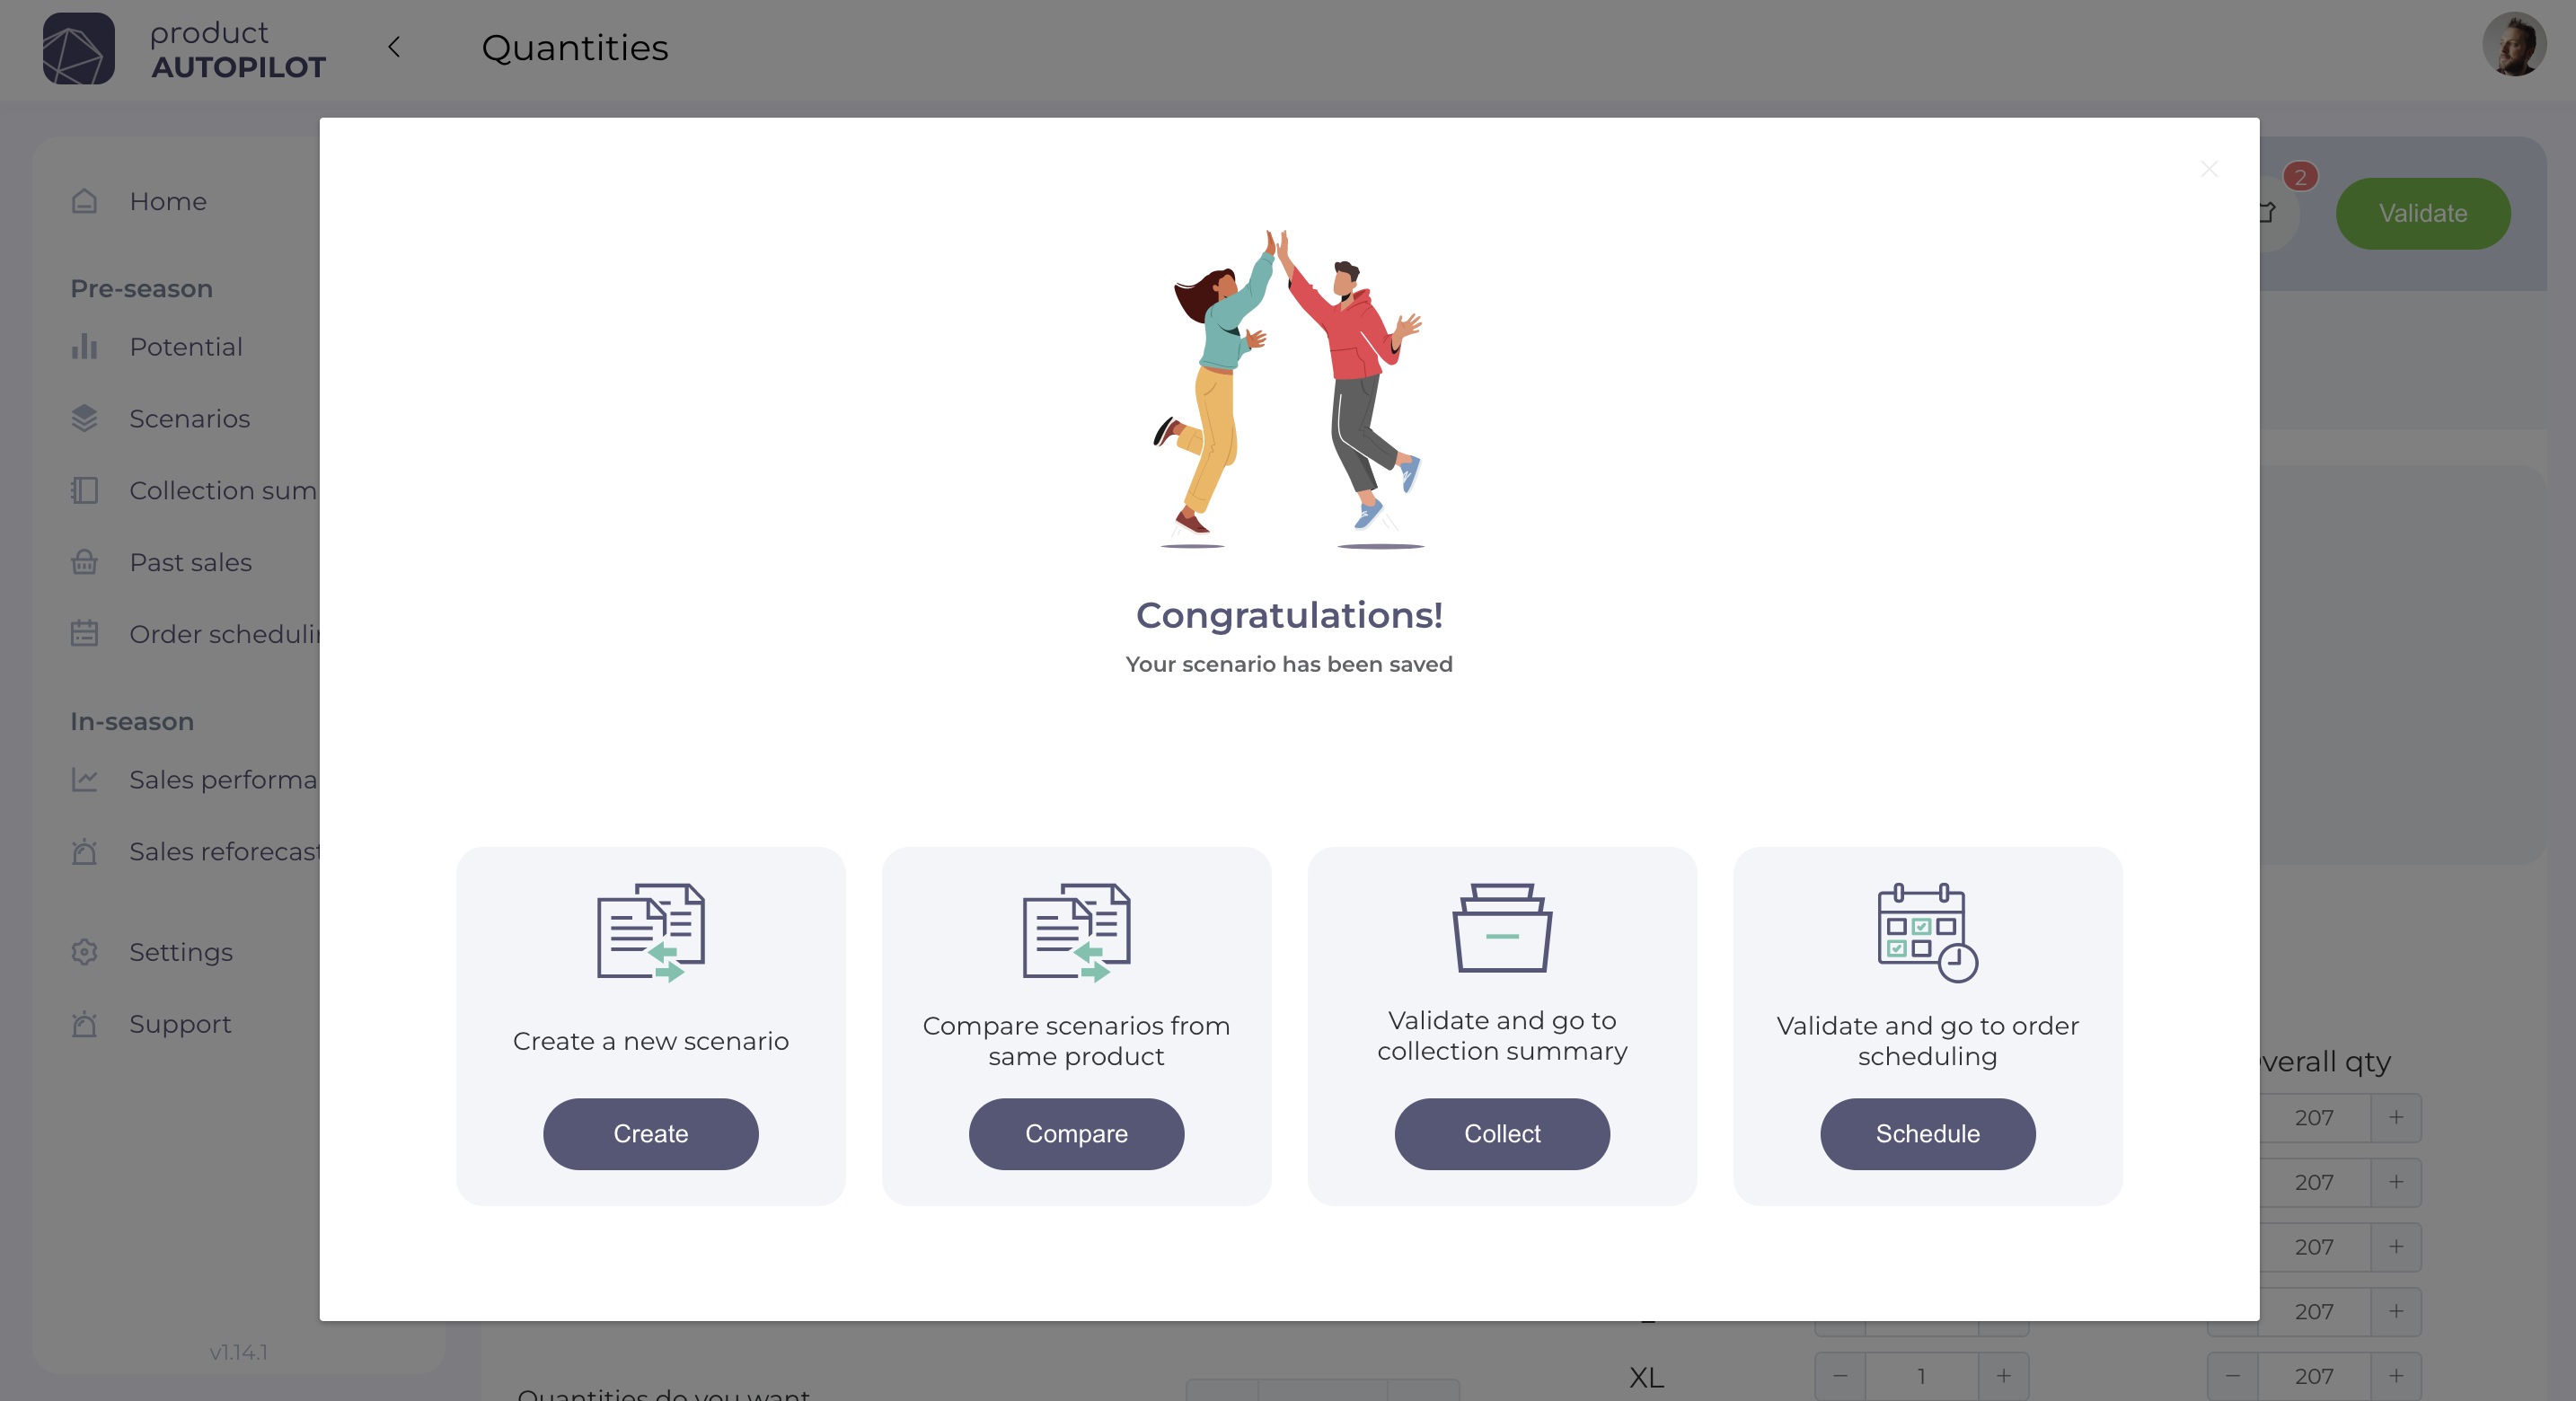
For the last two actions, this will change the status of the scenario directly from "created" to "validated".
Now you know how to make a detailed forecast on Product Autopilot!